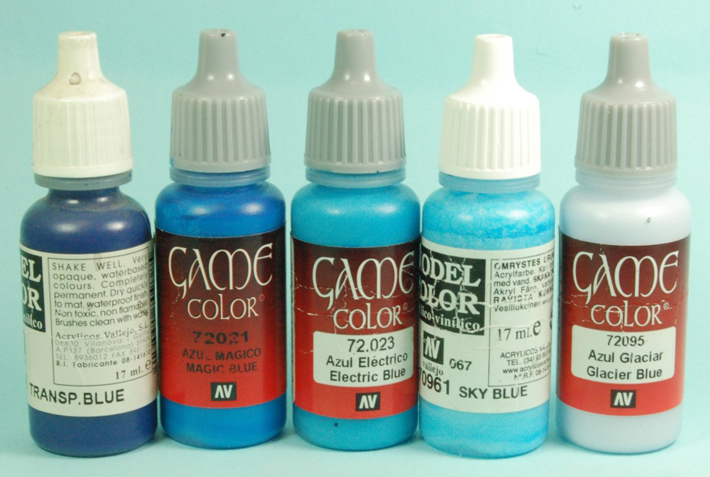
Painting equipment
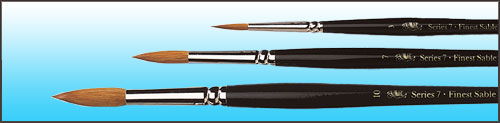
Brushes
I cannot stress enough about buying high quality brushes for the bulk of your painting, preferably Kolinsky sable. My favourite are Windsor & Newton series 7 in sizes ‘00’ ‘0’ and ‘1’.
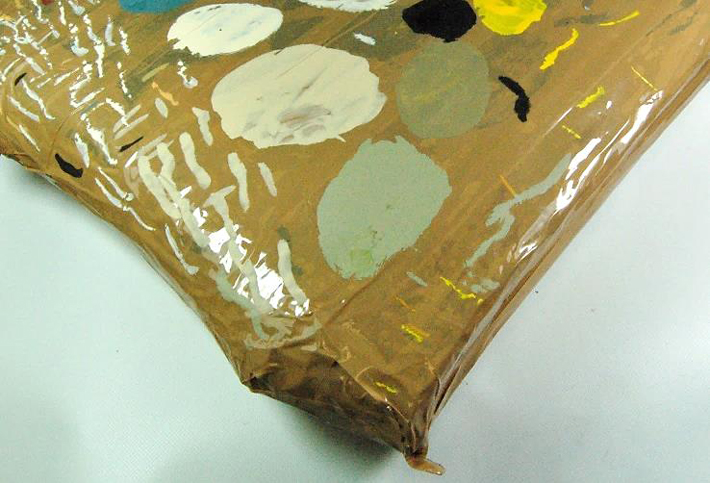
Palette
There are many available on the market, but I keep coming back to the cheapest and re-useable; a rectangle of cardboard wrapped in ordinary brown tape. (They grow over time!) Acrylic paint does not like new over old, as it re-hydrates and breaks apart, leaving fragments in your mix. Brown tape avoids all that.
Preparing miniatures for painting
As part of the production process, the silicon mould which the resin is poured into has release agents in it, which are sometimes transferred onto the miniature. It is recommended that you wash the miniatures in warm, soapy water and make sure they are completely dry, before any cleaning up or spraying with primer.
Primer
Aerosol primer is the best way to give the miniature a good surface to paint over. It has the benefit of showing you any bits of cleaning up that you have missed. I use three main colours, depending on the figure’s colour scheme: black, grey or white. Unless it is raining, I always do this outside.
Hold the miniature about 15 cm away from the can and spray in long even strokes. If it is cold outside, a good tip is to gently heat up the spraycan in warm water. This helps with the flow of paint, for an even coat. I then give the figure a blast with the hairdryer. This ensures that the primer is dry and it also bakes the primer, making it tougher and less prone to scratches or rubbing off.
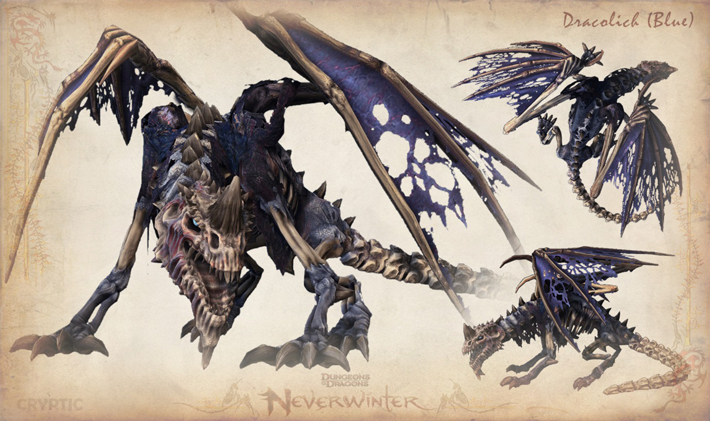
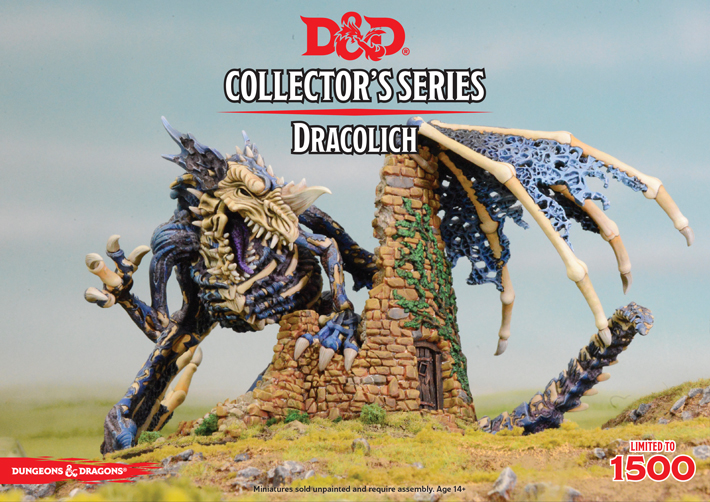
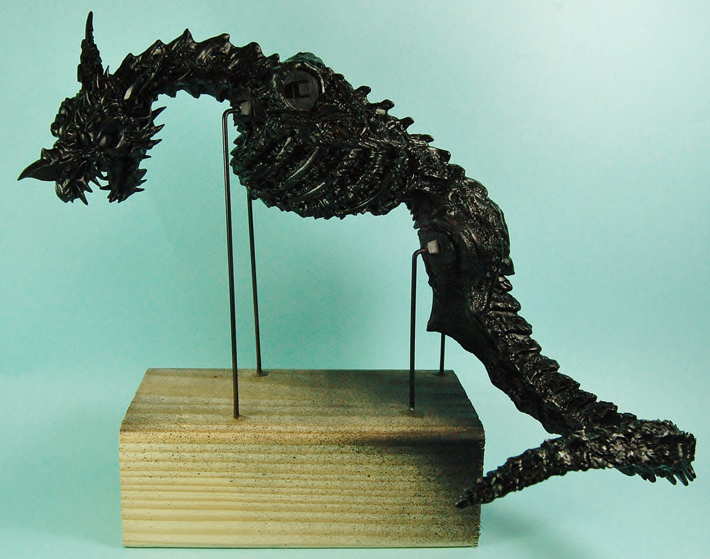
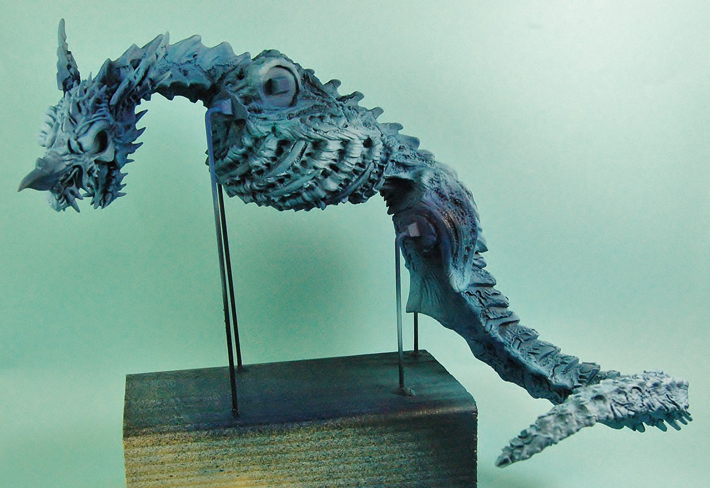
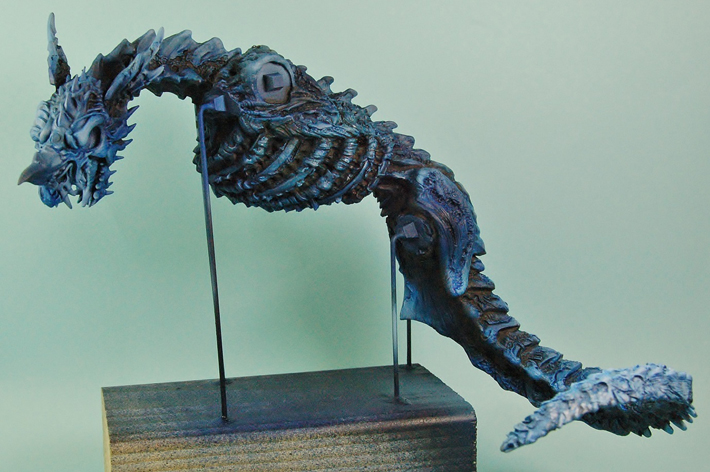
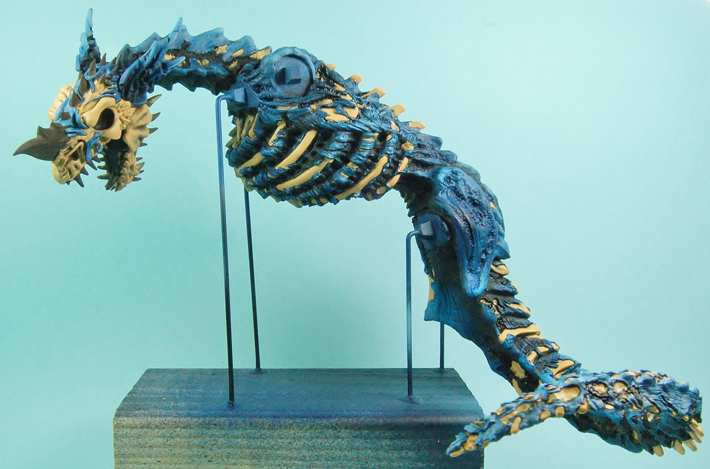
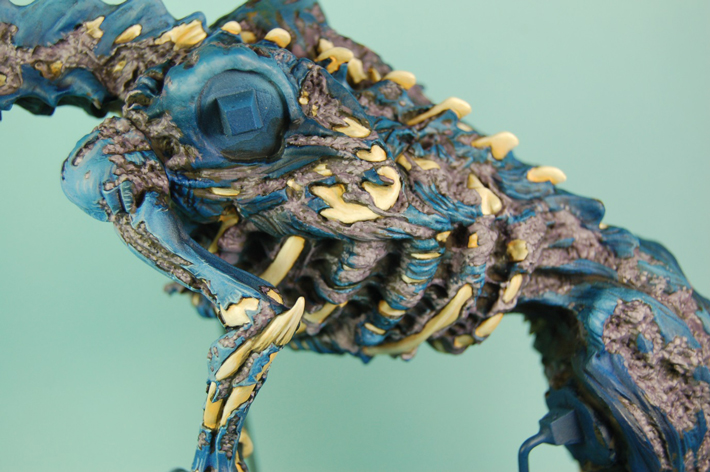
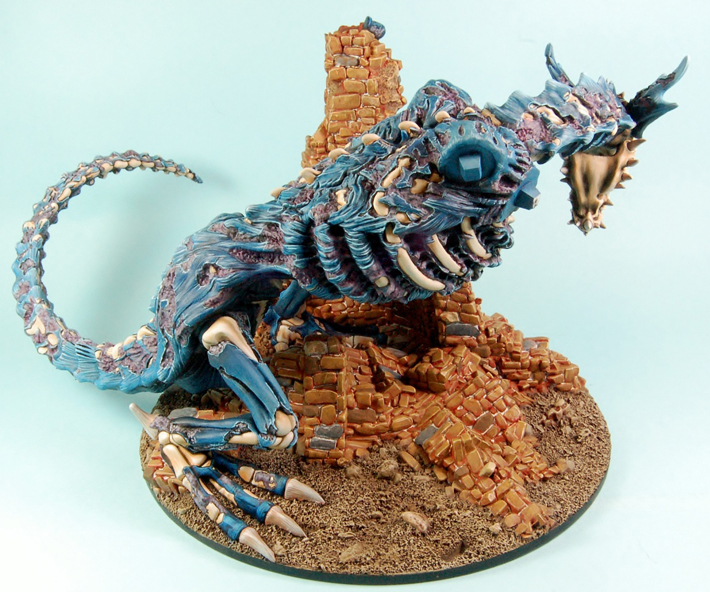
This Dracolich is based on a Blue Dragon from the Cryptic Neverwinter game, so the obvious primer colour choice is either dark blue or black.
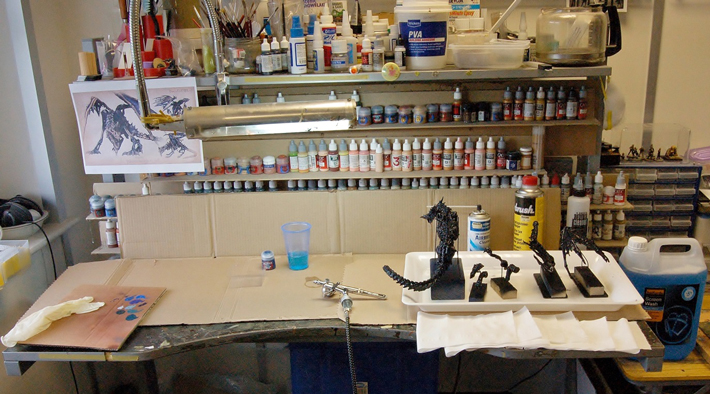
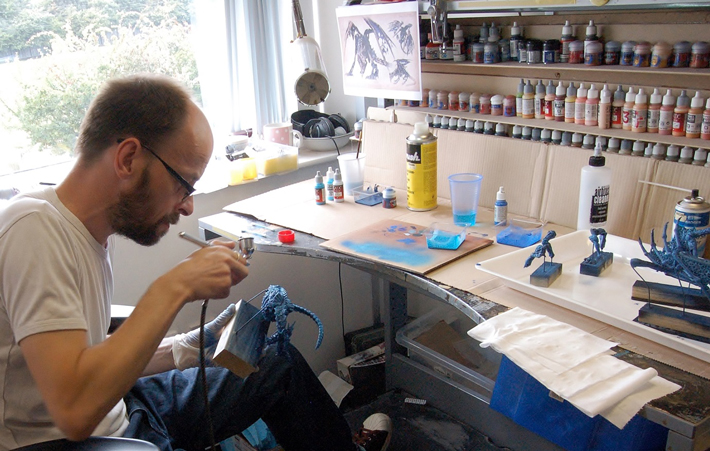
Airbrushing
With a model so large, the airbrush is a quick way of laying down paint evenly. I have only concentrated on blending the mid tones as the shading and highlights are done afterwards by hand.
I have written two previous articles “Using the airbrush” and “Adding texture to large creatures” for the website, which covers these techniques in more detail.
As with all airbrushing, my workspace is cleaned up, protected and everything ready nearby as paint changes are quick.
Because the airbrushed layers are very fine, one of the benefits of this is that you can make big jumps in the colours, instead of small incremental ones by hand.

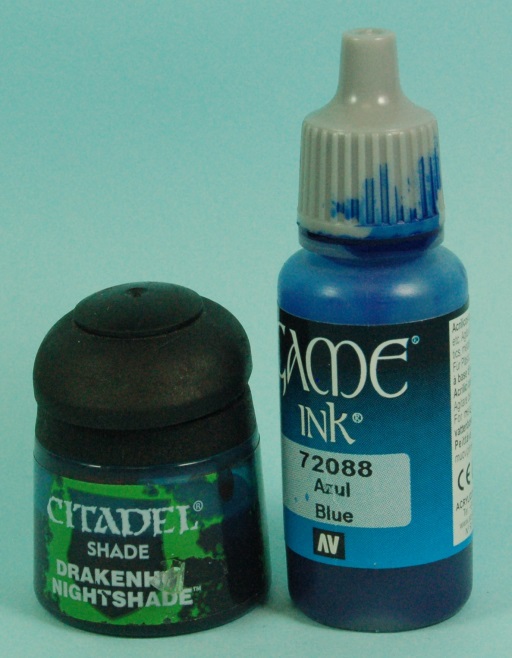
First stage ‘light’ shading
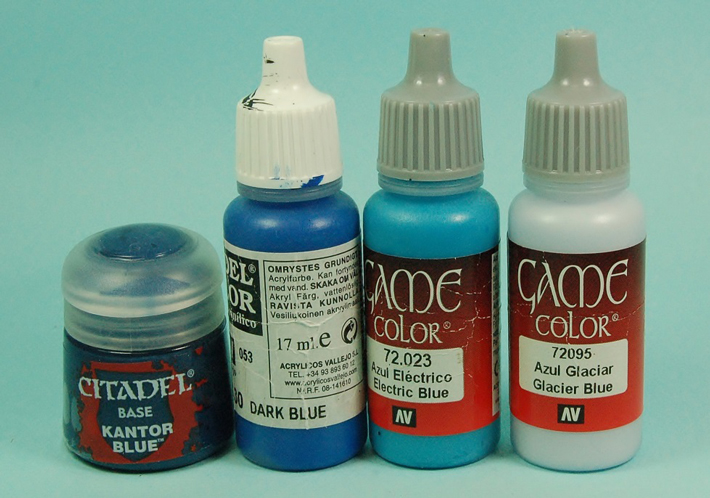
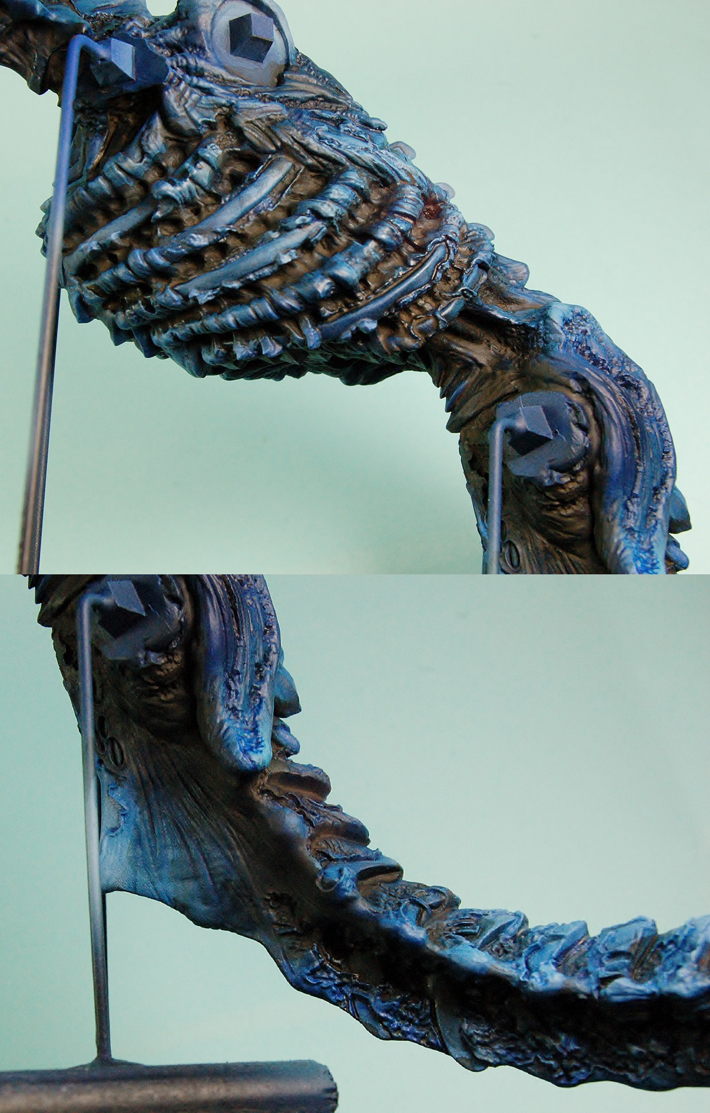
The blue skin tones are looking quite bleached-out at this stage and need ink washes for more richness and light shading, the deep shading comes later. For this I have used three to four coats of thinned dark blue and mid blue ink washes over the whole model.
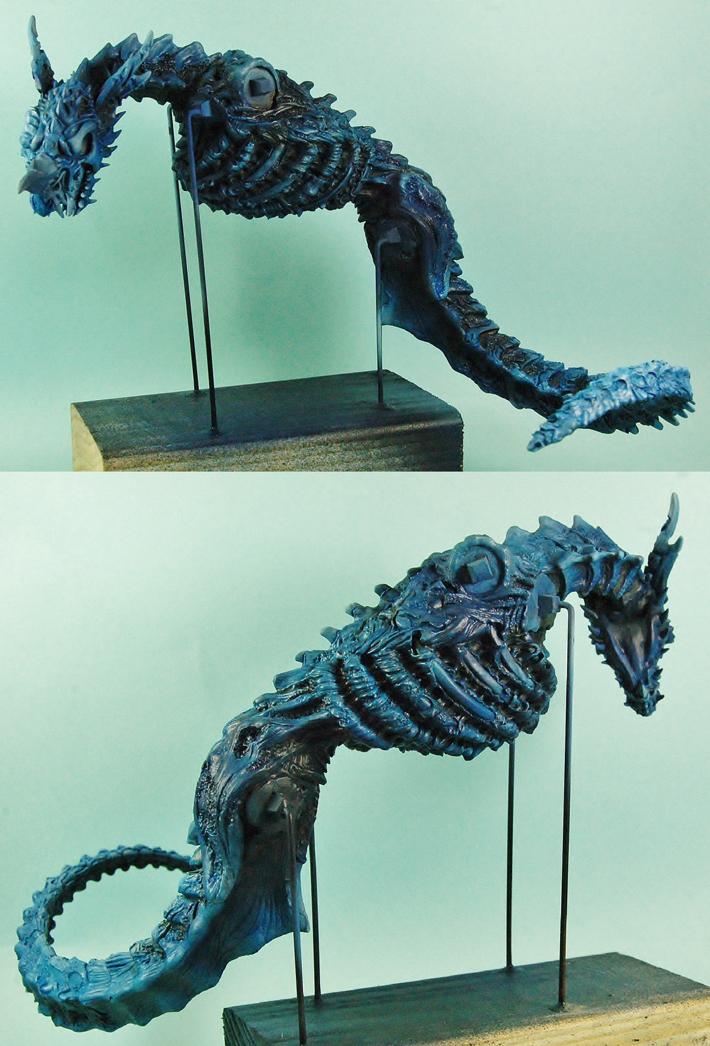
The shade is starting to build up under the jaw and tail areas.
The bleached-out colours are gently transformed into a richer blue tone.
Second stage darker shading
Working backwards, I now have moved on to the darker shade colours using thinned paint (about the same consistency as watercolours); this method is a little more aggressive than inks.

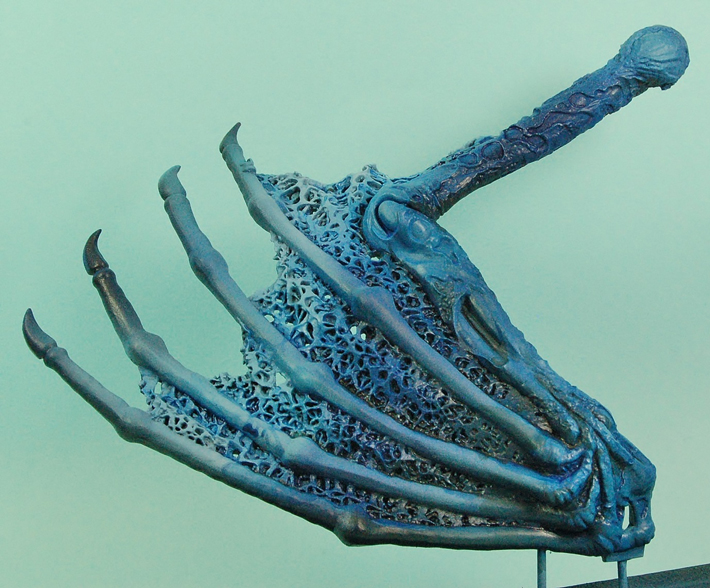
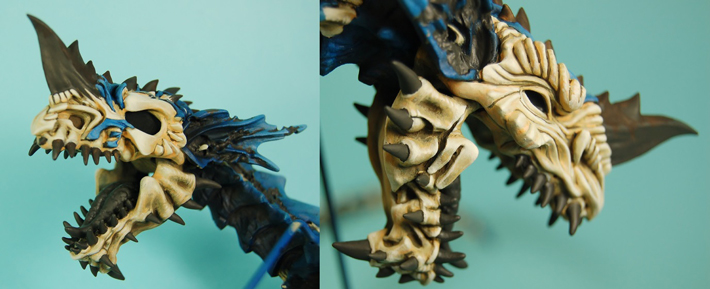
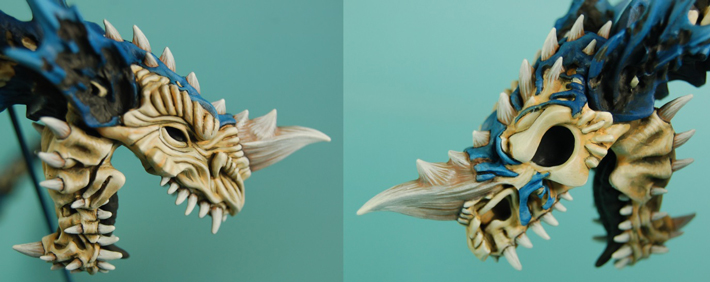
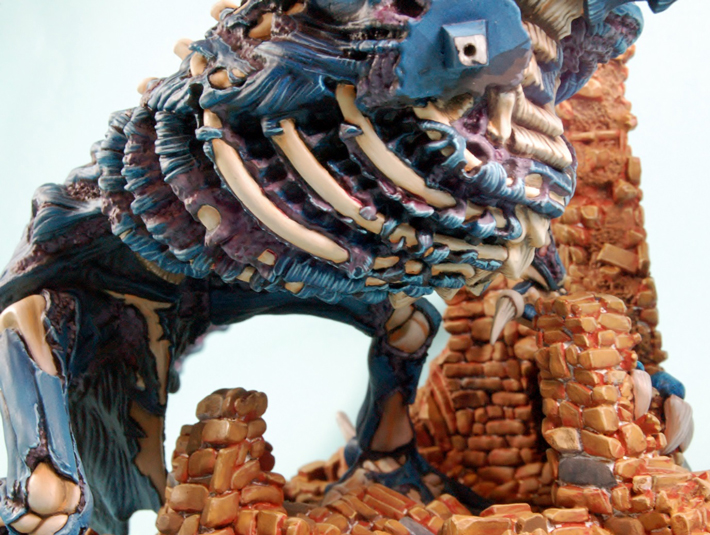
Black-lining
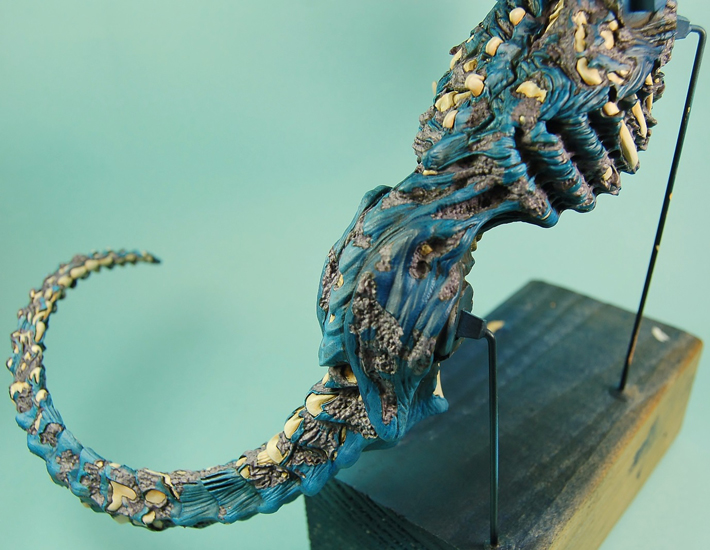
Now the basic blue skin colour and shading are finished (without the highlights), I can move on to preparation for the bones and other details. For this everything else is undercoated with black. This gives a border to all the other elements of the Dracolich, which makes them more pronounced.
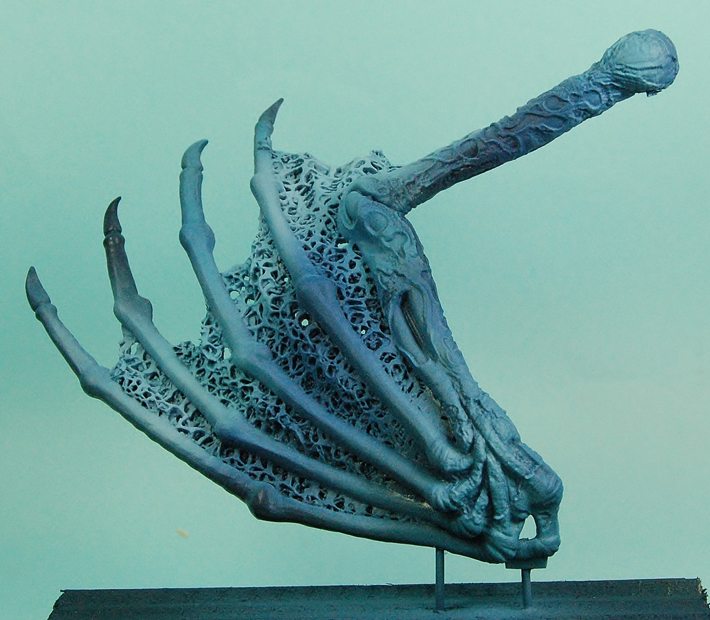
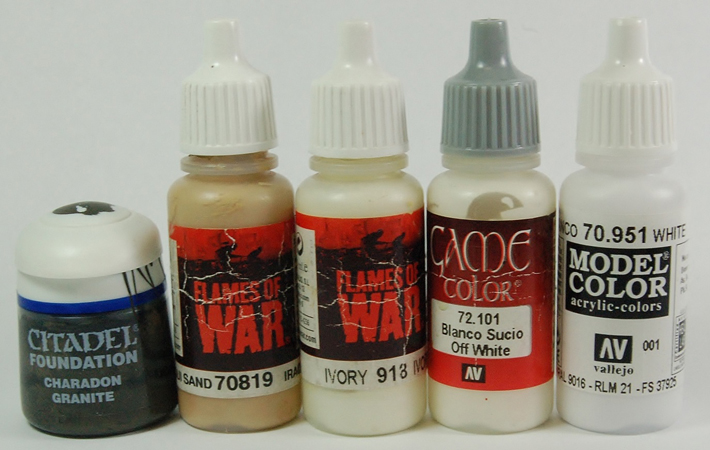
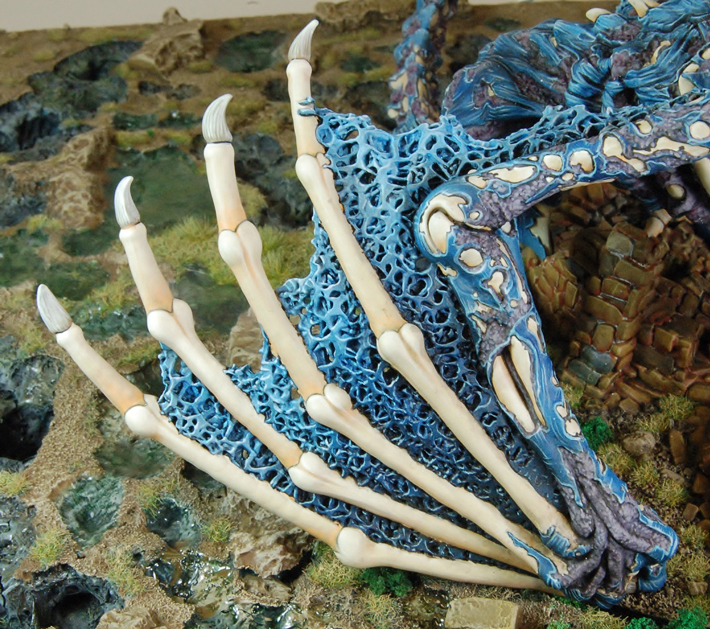
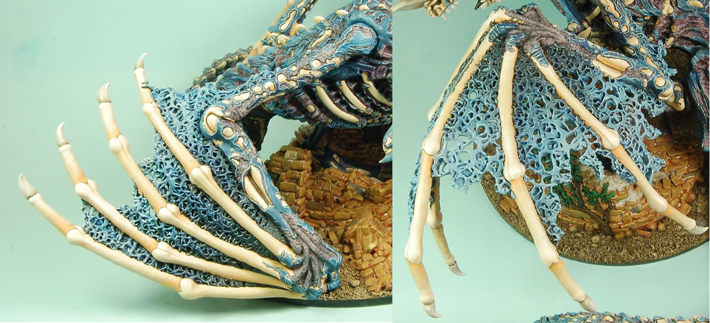
Bones
Leaving the teeth, claws and horns till later, the main bone colours are applied.
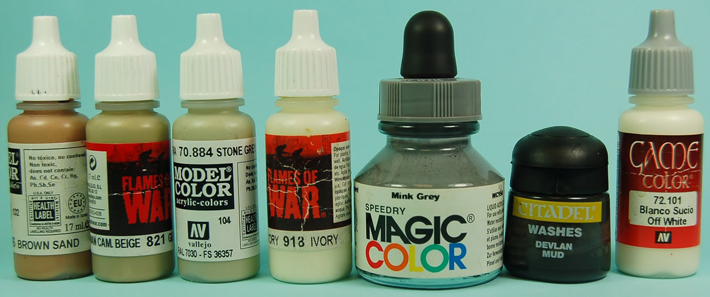
This is the selection of paints and washes used; they are quite a bright contrast to the darker blues.
This basecoat is carefully applied leaving the thin black border around each area.
The mid colours are painted on, building up the lighter areas ready for the highlights.
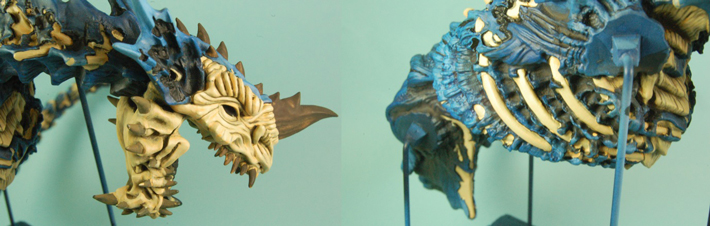
With the main bones complete, I can move on to the horns and teeth.
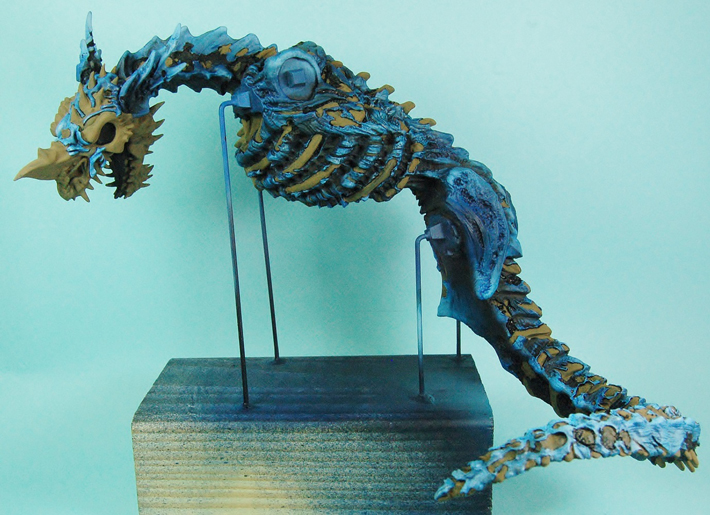
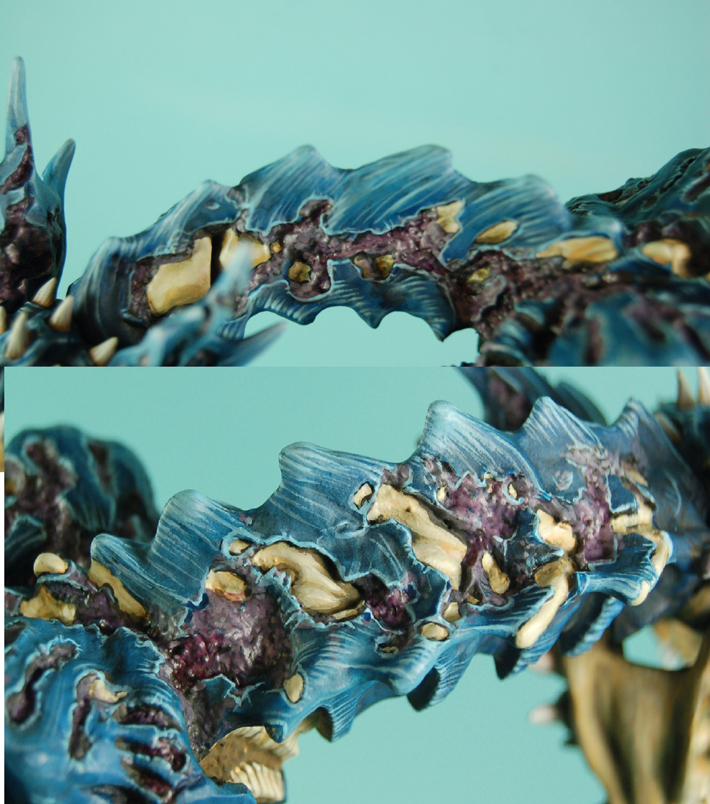
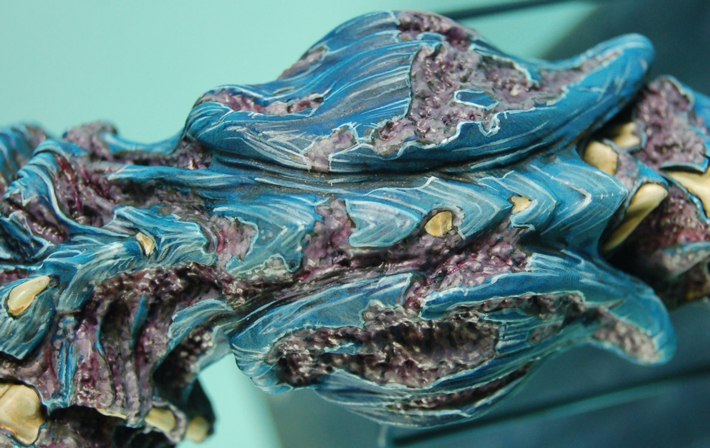
Mush
When a powerful Dragon foresakes life and undergoes an evil ritual to become undead, the result is a Dracolich. In this context, undead is aged and desiccated like a Lich, not rotting like a zombie.
To reflect this in the colour scheme, I have avoided any bright red or blood effects and have chosen a grey / purple range of paints, with purple ink and a tiny amount of very dark red ink for added richness in the shading.
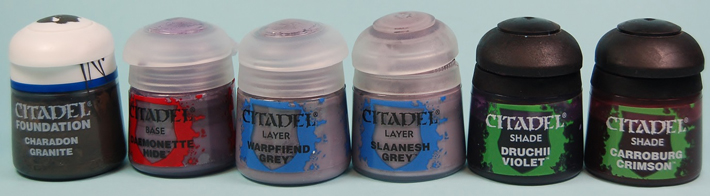
Just to change the texture, I have ‘dotted’ the Slaanesh Grey as a highlight.
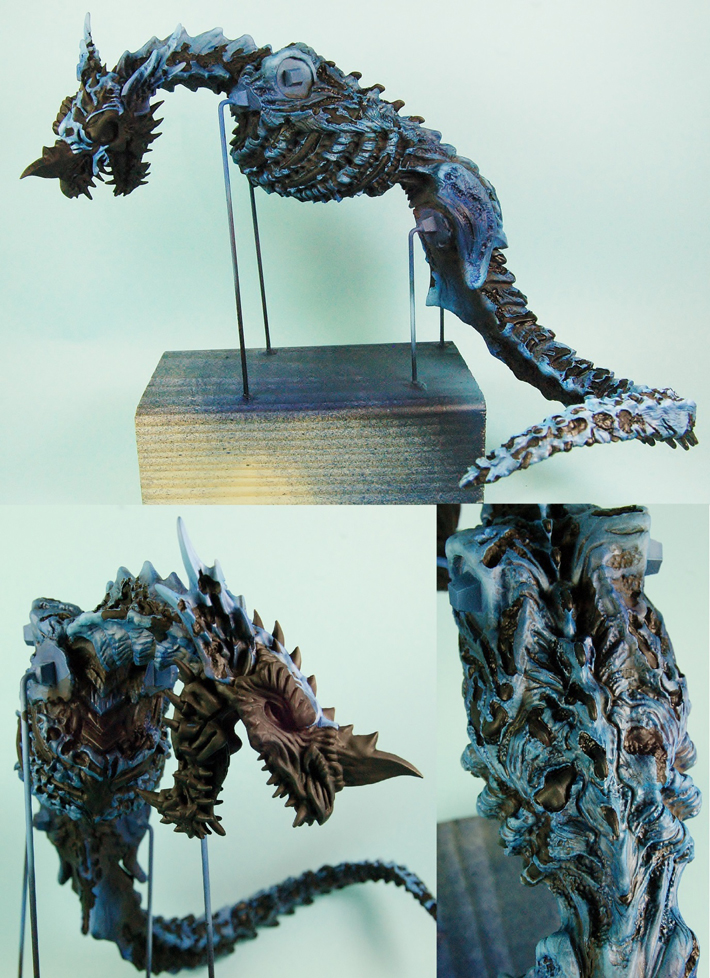
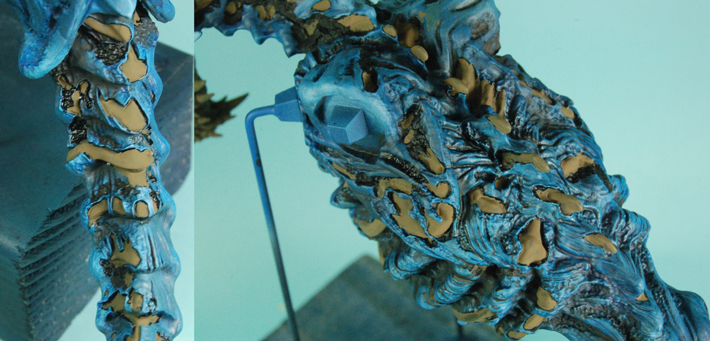
Highlighting the blue skin
I have saved this important stage of highlighting till last, for a number of reasons; with the skin generally on the top surface it is easier to paint now with the bones and mush complete, the Pastel Blue 901 acts as a border to the skin making each part more pronounced and has the bonus of tidying areas up. This is an image of half of the body highlighted, where you can see this happening.

I have decided to leave the very small details, such as its burning blue eyes, till the model is fixed to the base. This is where I can see everything in context, which makes the final highlights and adjustments easier.
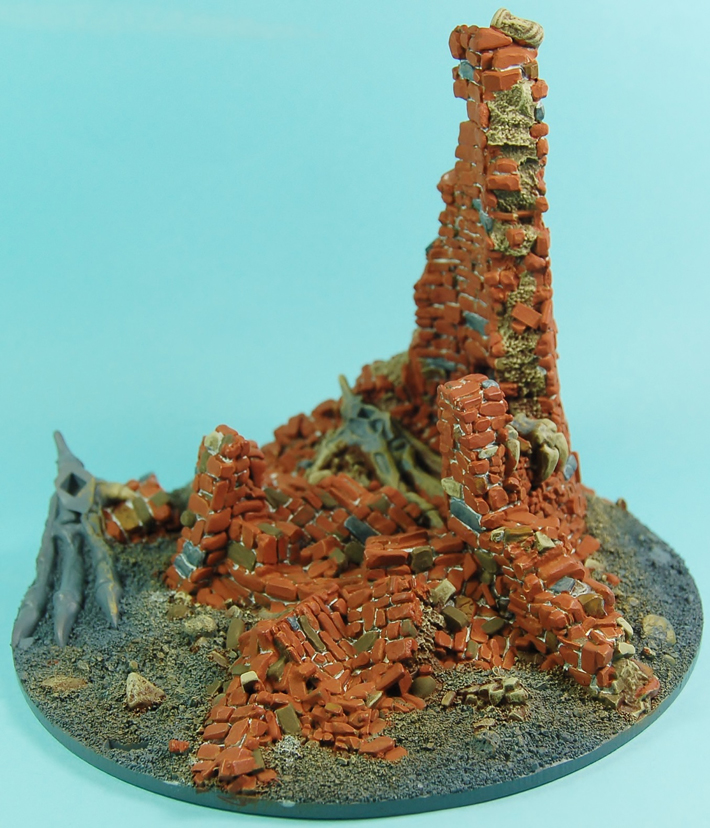
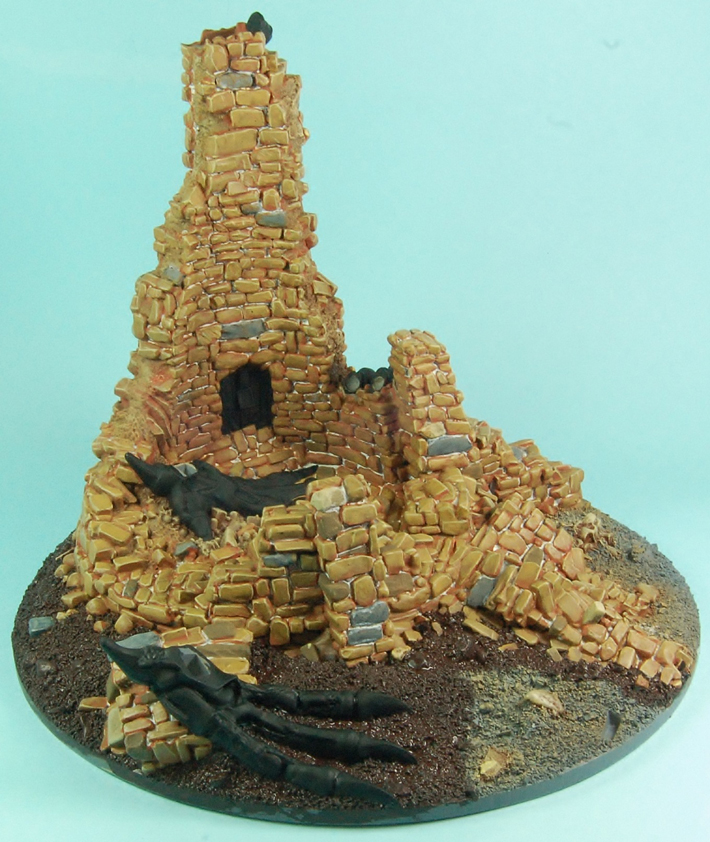
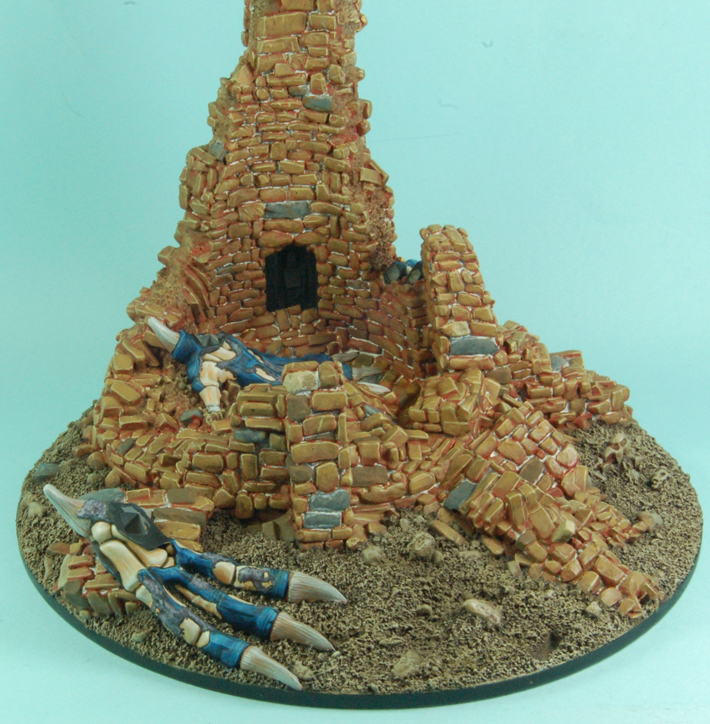
The broken tower base
I really like scenic bases like this, where you can paint it straight out of the box or go crazy with the details. Before any painting, the separate plinth will need to be securely glued in place with strong glue, such as two part epoxy.
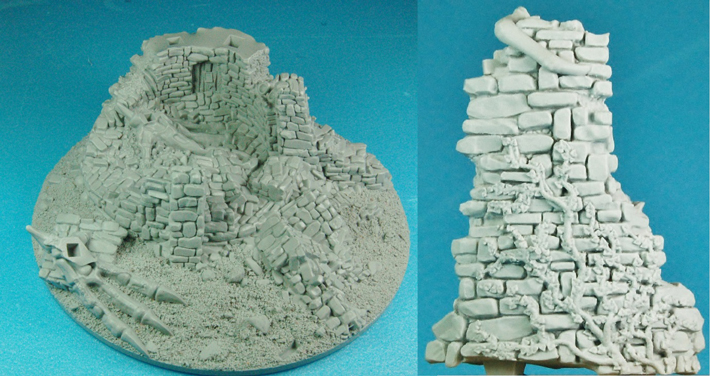
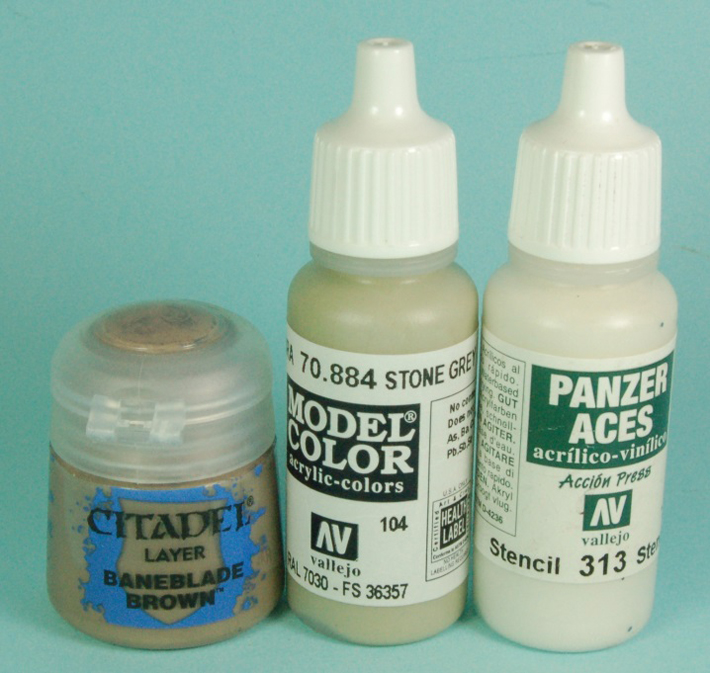
I have chosen an overall contrasting sand stone palette, with some random colour variations on some of the bricks.

To start with, I have drybrushed all the bricks with the colours above. The overall tone is quite light at the moment, but will darken down after weathering and shading.
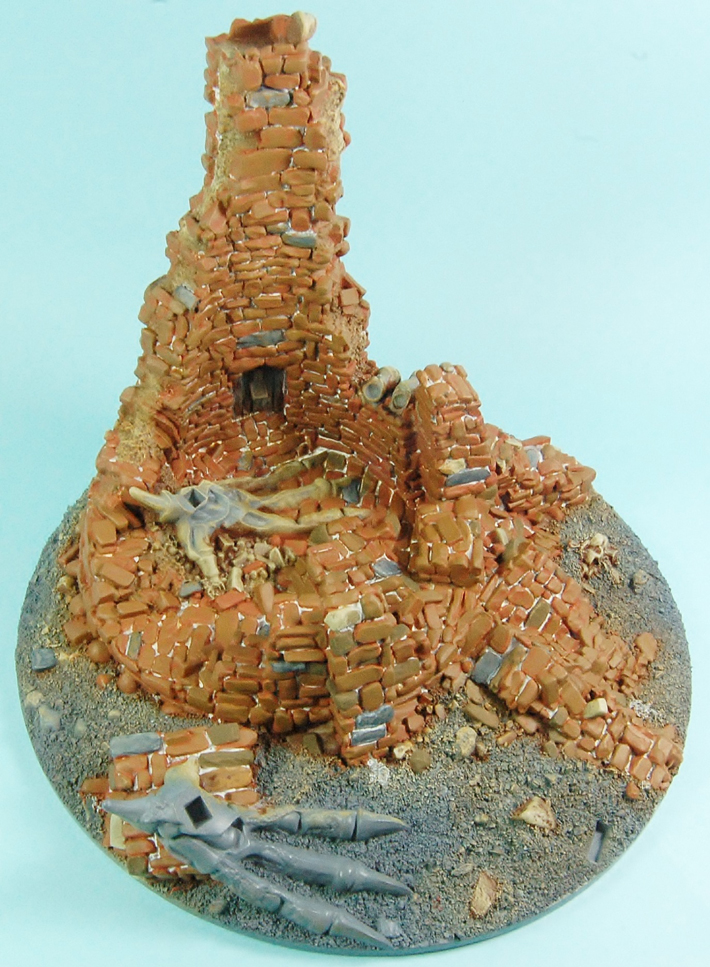
It was at this stage that I decided to paint the mortar inbetween the bricks using Off-White 820 and washing-up liquid. This technique allows the paint to flow freely around the deep channels using capillary motion. Only use the smallest amount of washing-up liquid and the whole model will need to be varnished afterwards as the paint can be wiped off easily by accident.
This technique sort of worked, but it did leave all the edges of the bricks looking quite messy.
In retrospect, this mortar technique should have been applied first over a dark primer before painting the bricks.
Instead of painting each brick edge again, I went for a re-paint (somethings work first time, some don’t!). This gave me the opportunity to tweak the brick colour palette for a redder basecoat.
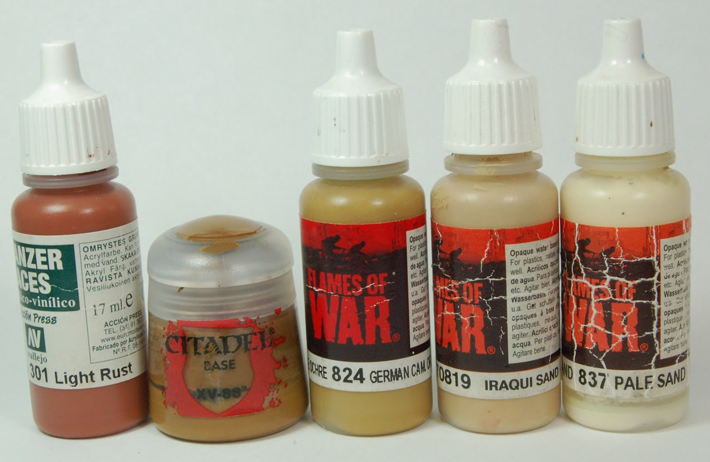
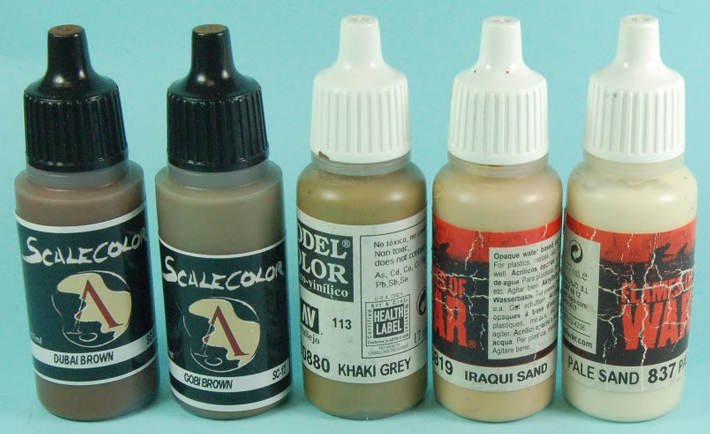
Panzer Aces Light Rust 301 basecoat
Games Workshop XV-88
German Camouflage Orange Ochre 824 pre-highlight. A thinner paint / water mix than normal, concentrating on the top area of each brick.
The grey bricks are just Neutral Grey 992 with Panzer Aces Light Rubber 305 highlights and the occasional Buff 976 brick, with Pale Sand 837 highlights.
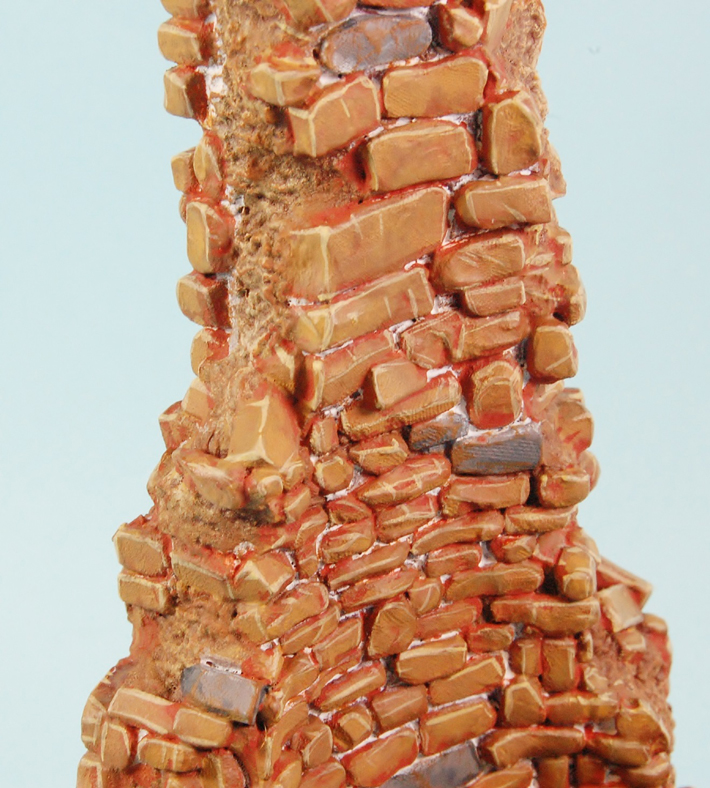
The first stage of highlights with Iraqi Sand 819 are painted on, any mistakes are cleaned up as I go.
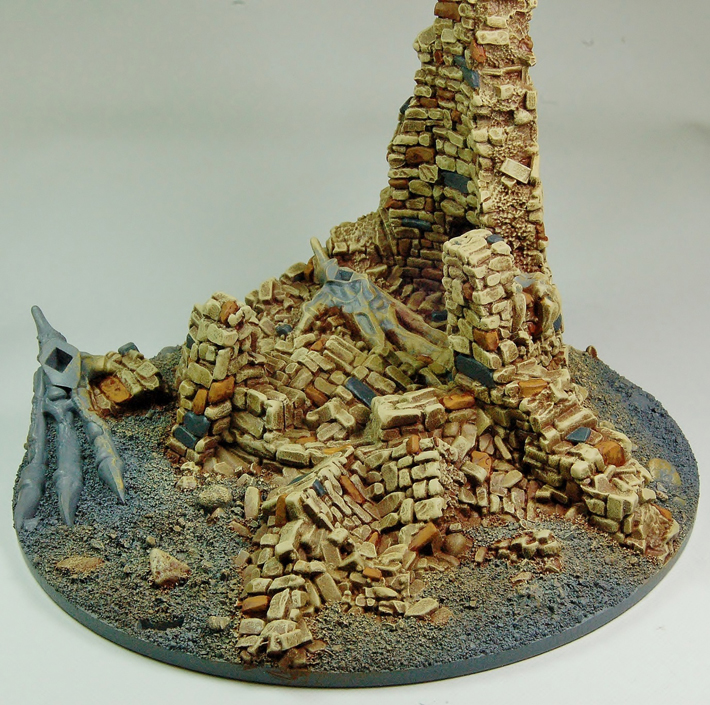
The last highlight of Pale Sand 837 is a dot in each corner of the bricks. This is painted on after the main Dracolich body has been attached, so I can get the lightsourcing correct in situ.
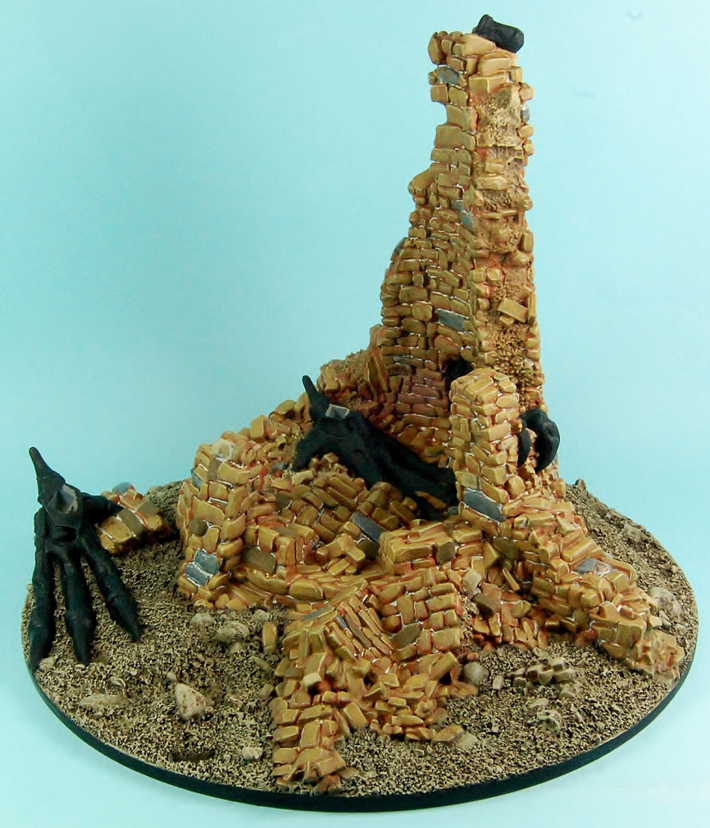
Base groundwork
Before any groundwork is painted, all the Dracolich feet and base details are painted black.
The groundwork tones are the original brick colours. Start with a basecoat of Scale 75 Dubai Brown. This paint range dries to a very matt finish, so it is perfect for groundwork. Then carefully drybrush the remaining lighter colours over the top.
Same method as before, when painting the feet.
Fitting the body
I know this is jumping the gun a little, but the basic body does not interfere too much with any base details and it does put everything into context when finishing off the base.
Dry fitting the body first is a sensible thing to do, as this will highlight any potential problems. I was very happy with the overall fit and decided to glue the torso down to the base with epoxy glue.
This gives me the opportunity to show you some of the hard to see areas.
Repairs!
During the last session of photos, I accidently damaged the tip of the Dracolich’s main horn. After a lot of swearing, the easiest method of repairing a sharp point like this is to drill into the part and attach a sharpened brass wire pin. This becomes a strong former for the putty. The putty is applied and left to dry and then carved back to the correct shape. Luckily the horn highlights are pure white at this point and can easily be re-painted without leaving any evidence.

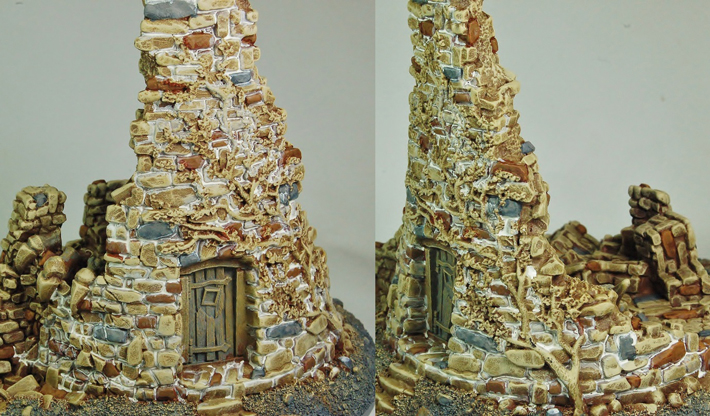
Tree
The tree is an important addition to the base; it gives a sense of scale to the model and is the same reason the door is in the broken tower, and it adds a splash of needed colour.
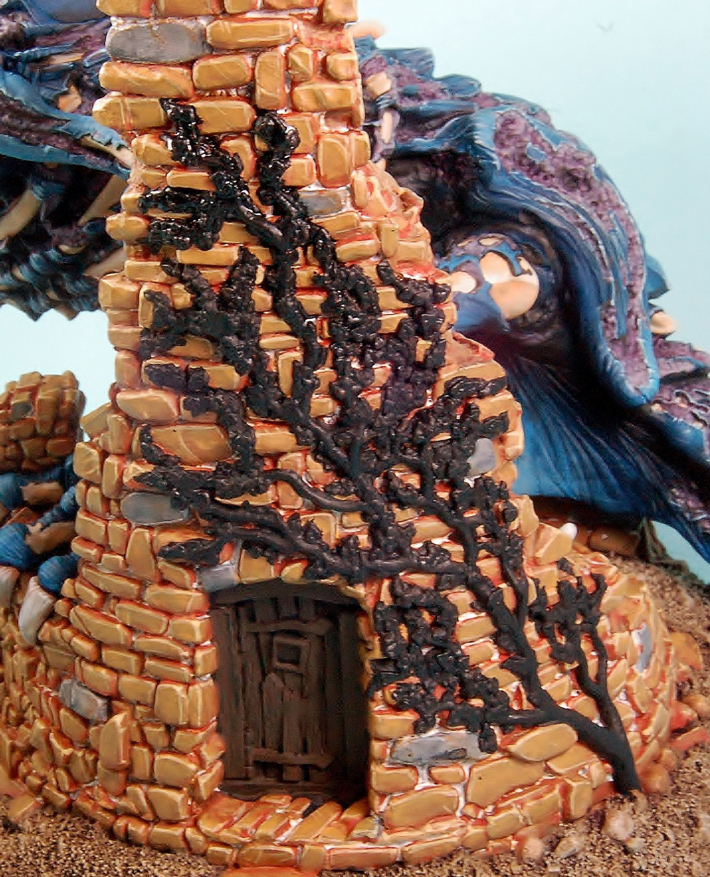
The silhouette of the tree was tidied up with a black basecoat, ready for the foliage.

I have chosen bright green for the leaves, as they contrast with the sandstone and blue skin and really stand out.
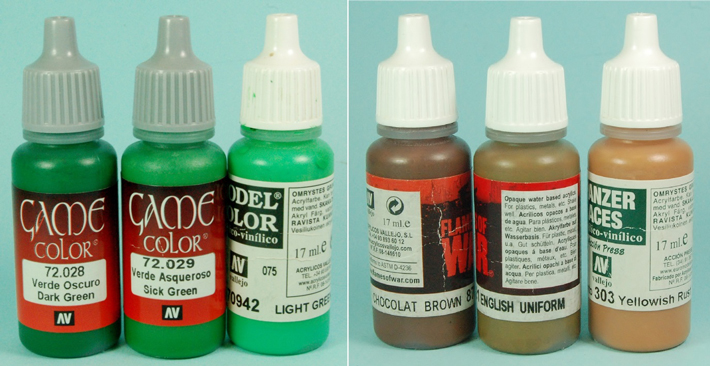
All the branches are then carefully painted in with Chocolate Brown 872, English Uniform 921 and Panzer Aces Yellow Rust 303 for the final highlight.
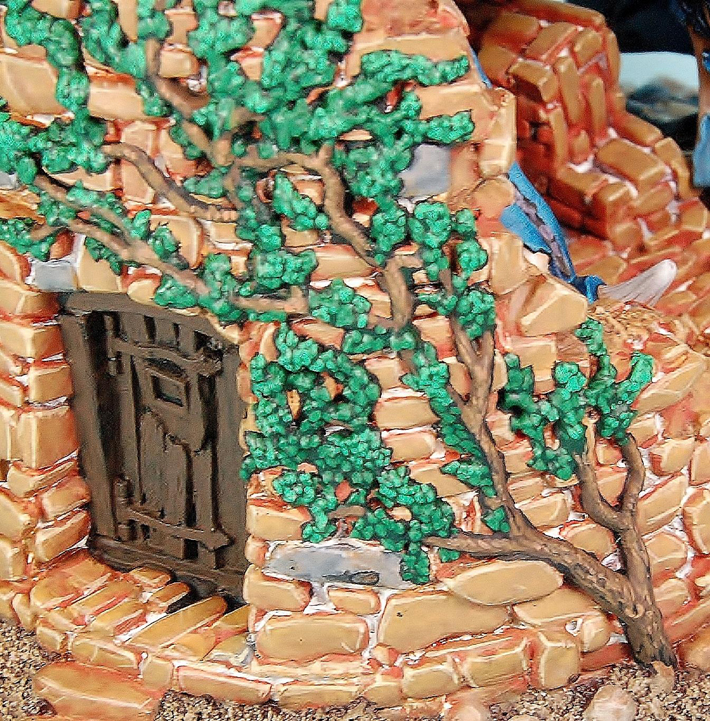
Door
I have kept things simple and just painted a woodgrain texture and rust effects on the metal parts. There is no other woodgrain on the whole model, so that in itself makes it stand out.
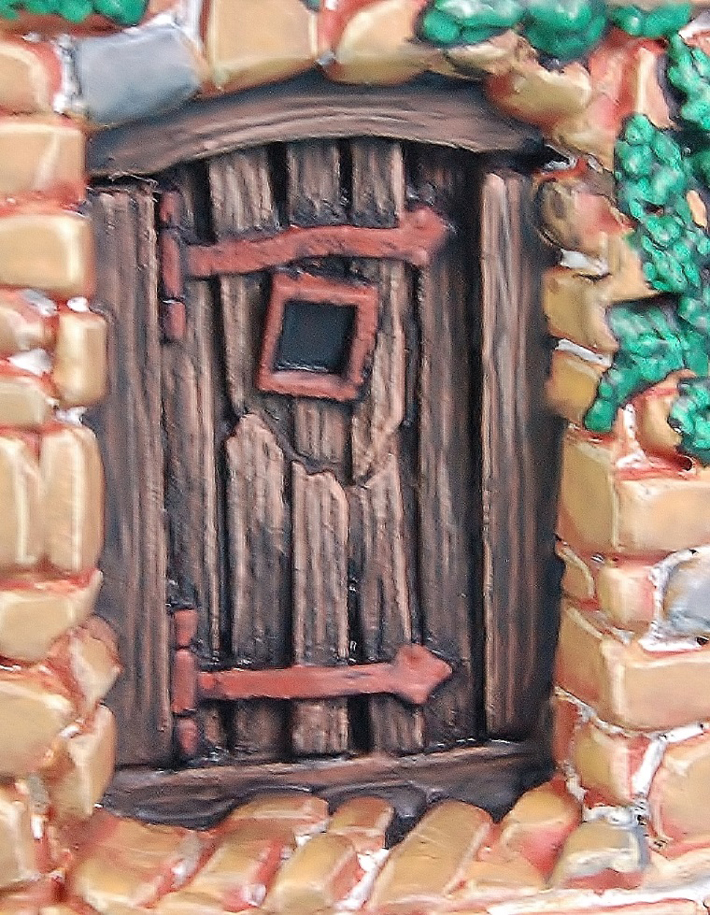
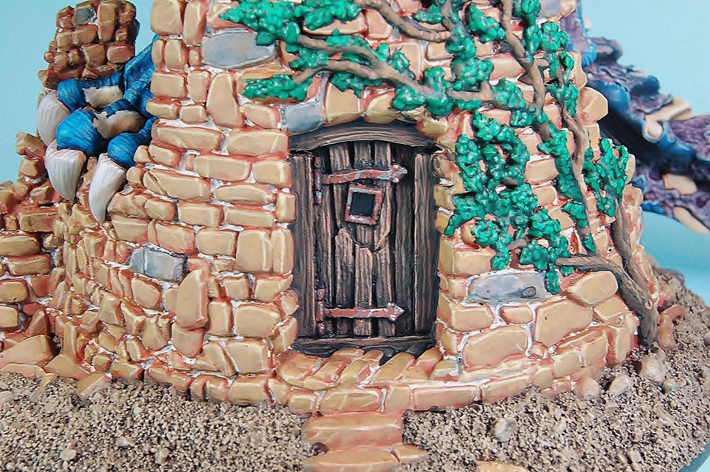
The rusty hinges are highlighted with silver in patches.
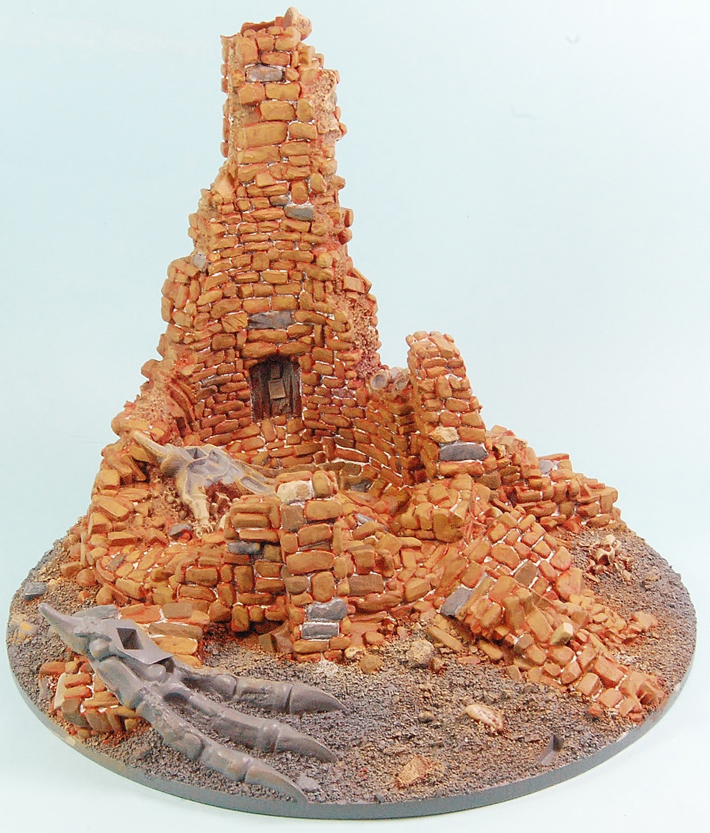
Brick mortar
Following the same colours as the main walls, the mortar between the walls is added.
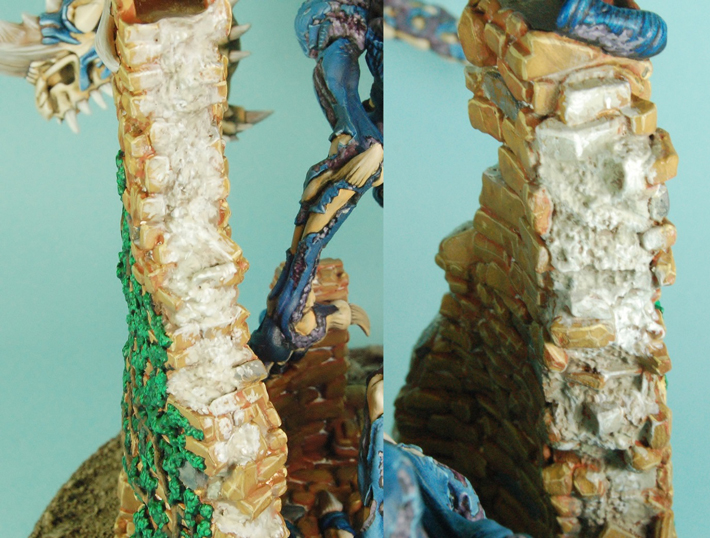
This is painted in three stages, using light stone colours.
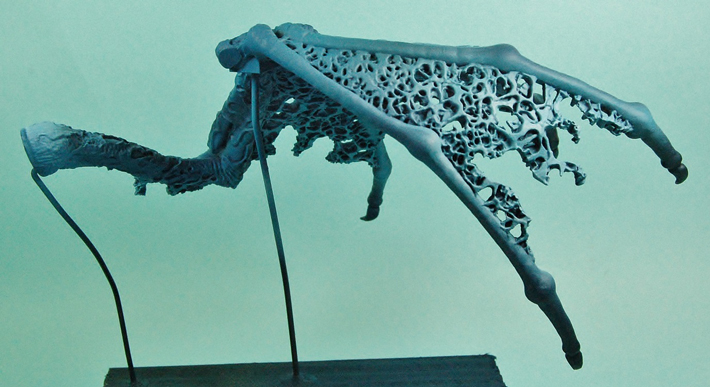
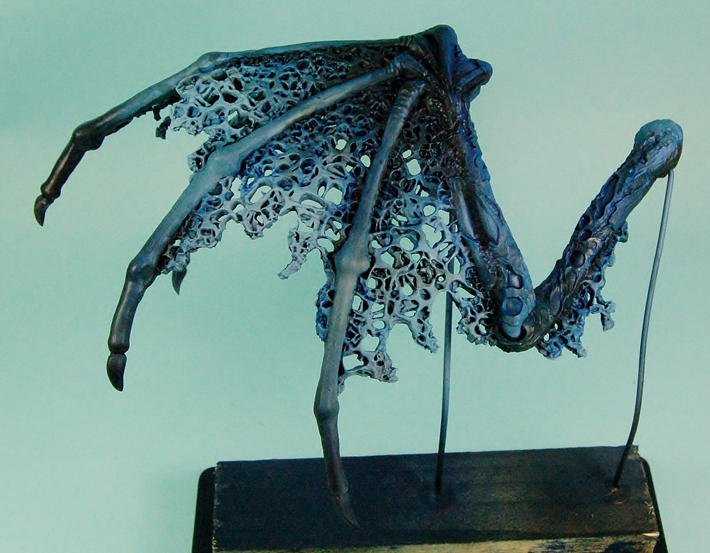
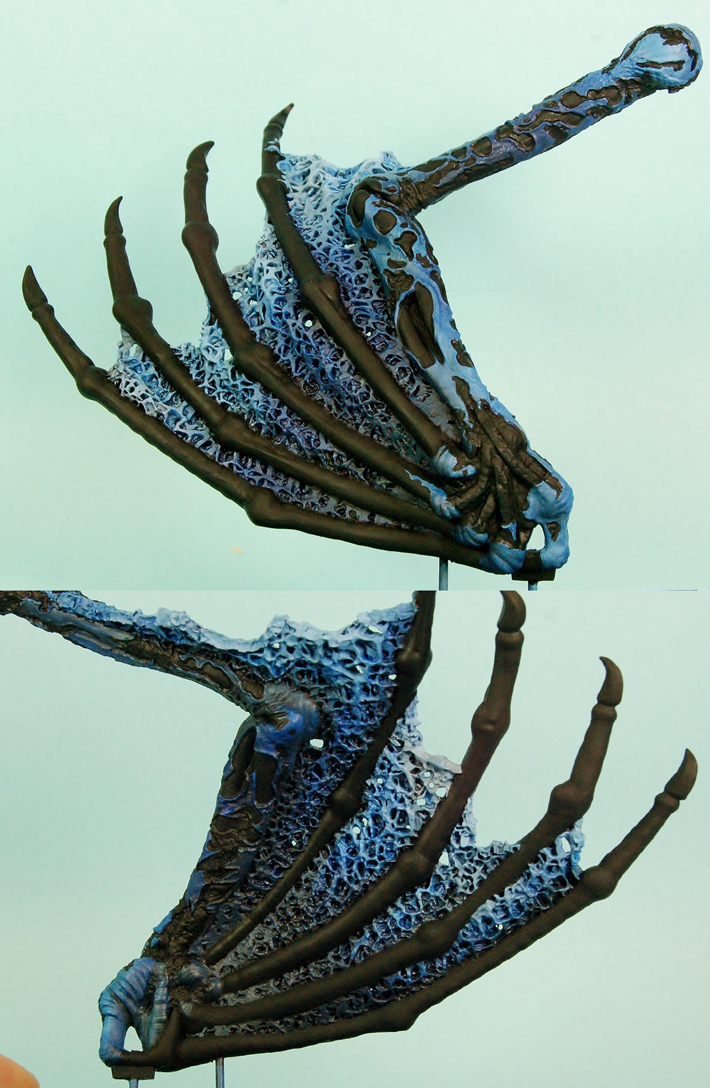
Wings
That is all the major parts painted now, except more some small facial details. I can now fit the wings and finish off the bones, claws and mush in situ, using the same paint mixes and stages as before.
Final details
Tongue
To complement the blue colour scheme, I have opted for a purple tongue.
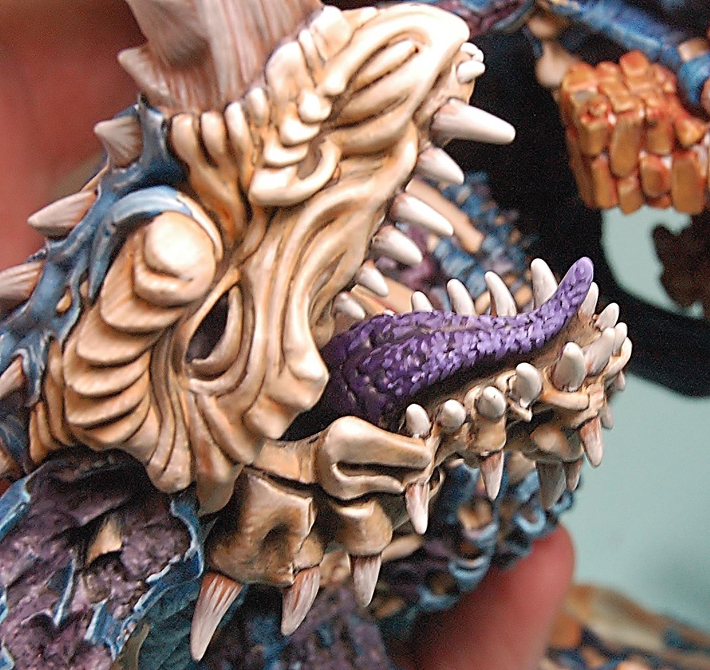
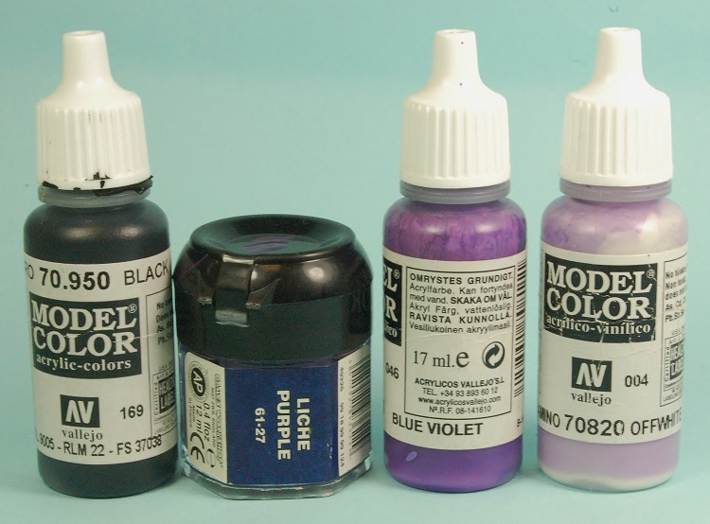
The last bottle is a mix of Blue Violet 811 and 50/50 white, as I haven’t been able to find a good paint in this tone. The final highlight is ‘dotted’ on for a different texture.
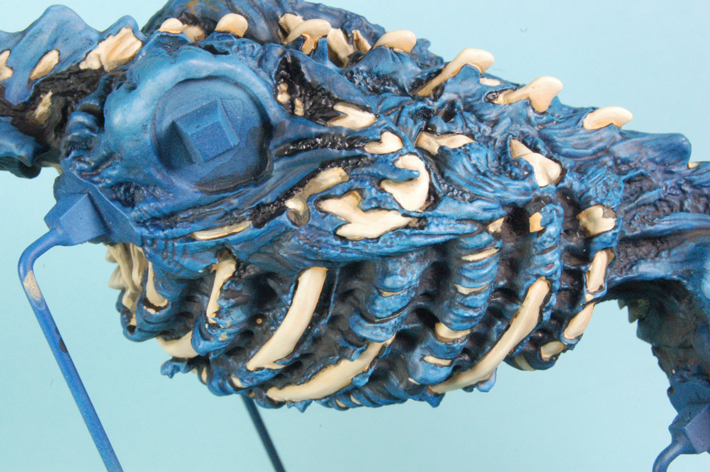
Burning blue eye
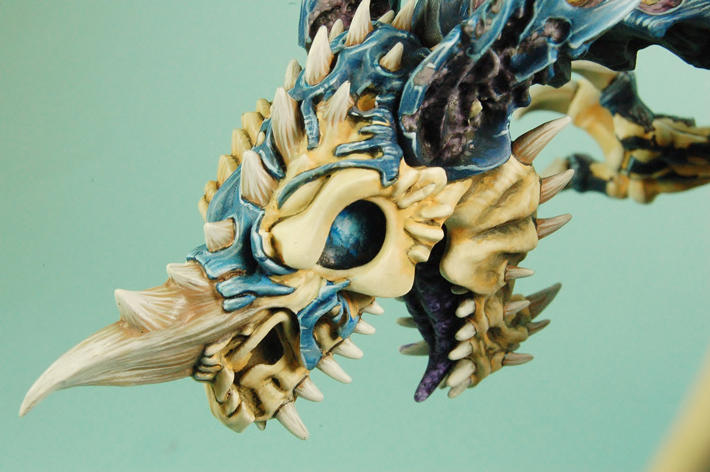
These colours are painted into the eye socket in a thin mix, with a few highlight dots randomly added to represent sparks.
Base foliage and static grass
The clump foliage is Woodland scenic, glued down with superglue. This makes the clumps quite hard, making them easier to drybrush and more hard-wearing. The static grass is attached with PVA glue applied with an old paintbrush.
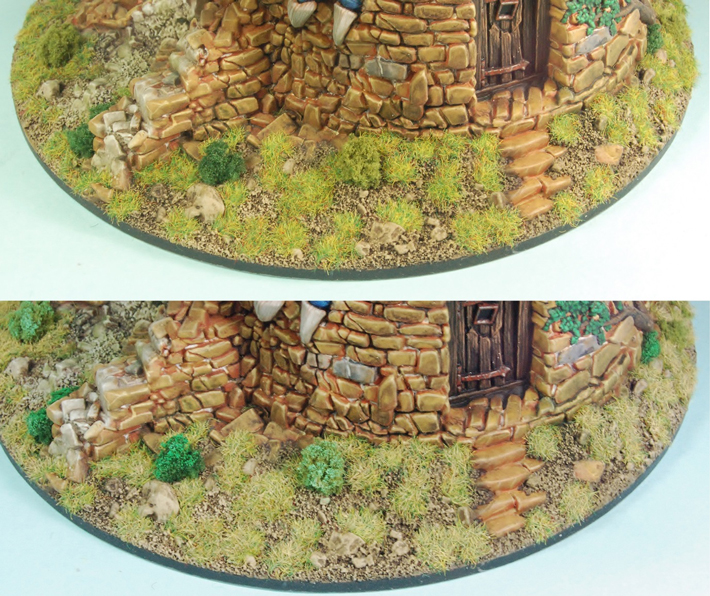
As you can see from both images, the lower one is much more toned down in colour, as static grass can be on the bright side straight out of the bag. Drybrushing also brings out more of the grass details. I have used Buff 976 for this.
Mat varnish
The final thing to do is seal everything in with matt varnish. I recommend you warm the aerosol can first with warm water, this helps keep a smooth, even flow.
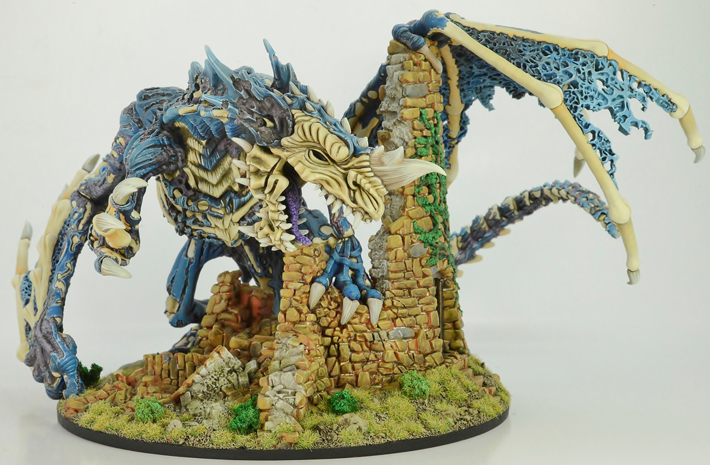
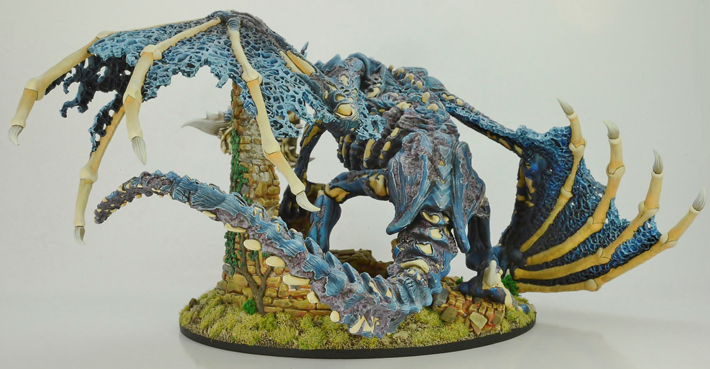
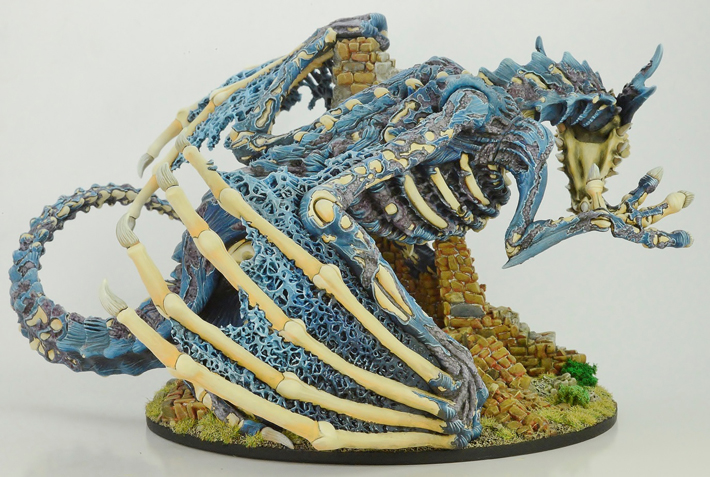
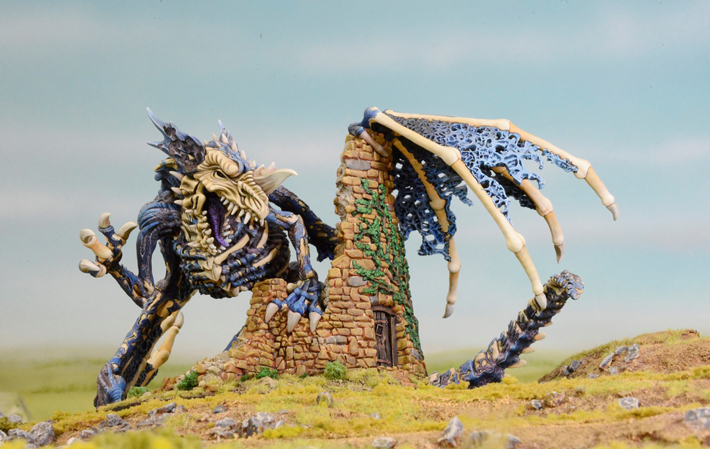
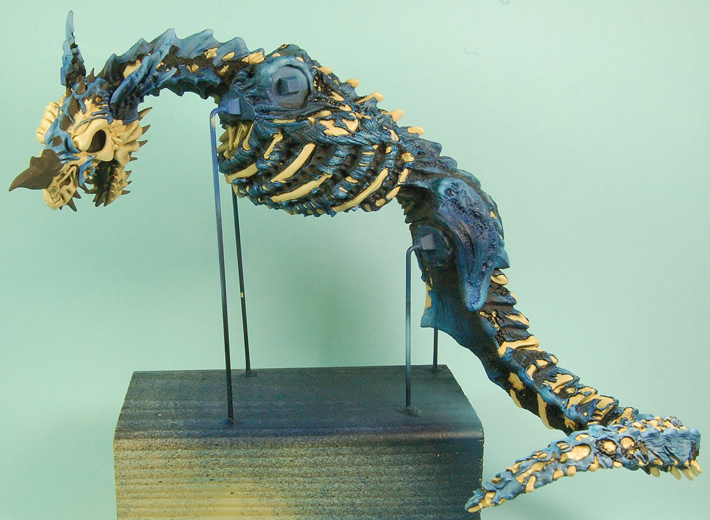
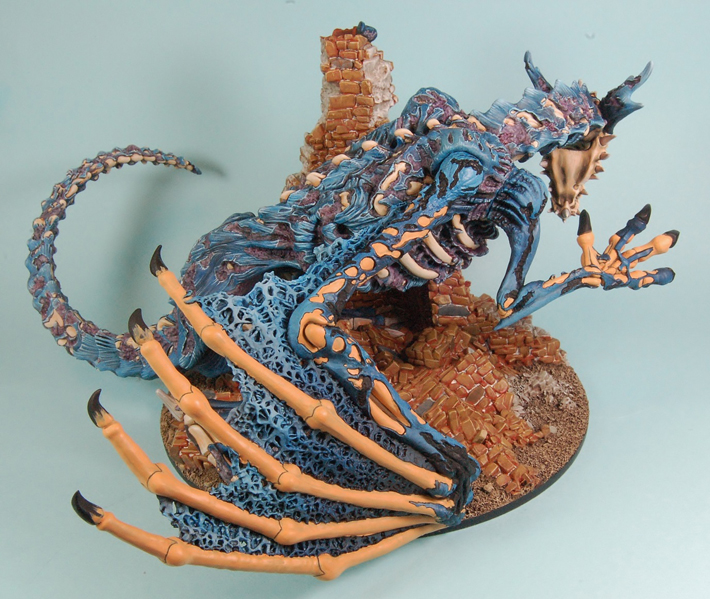
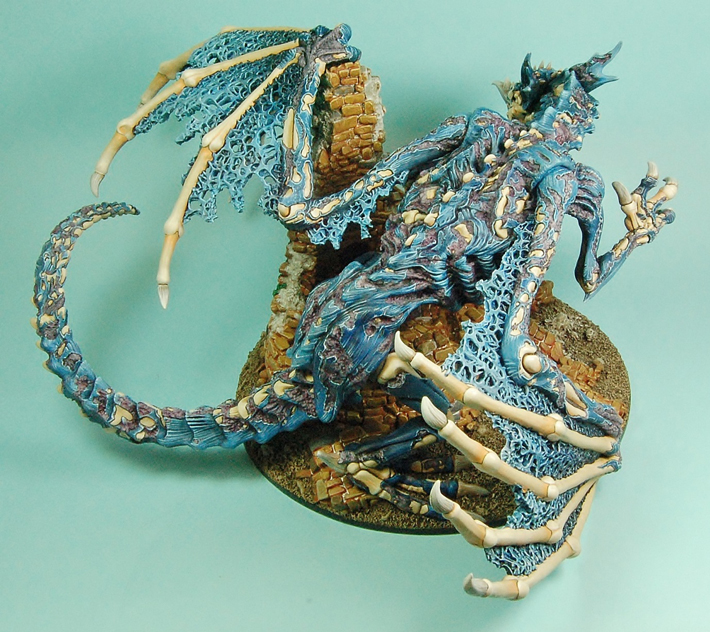
Final images