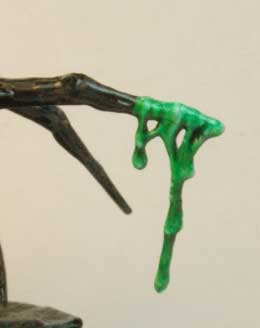
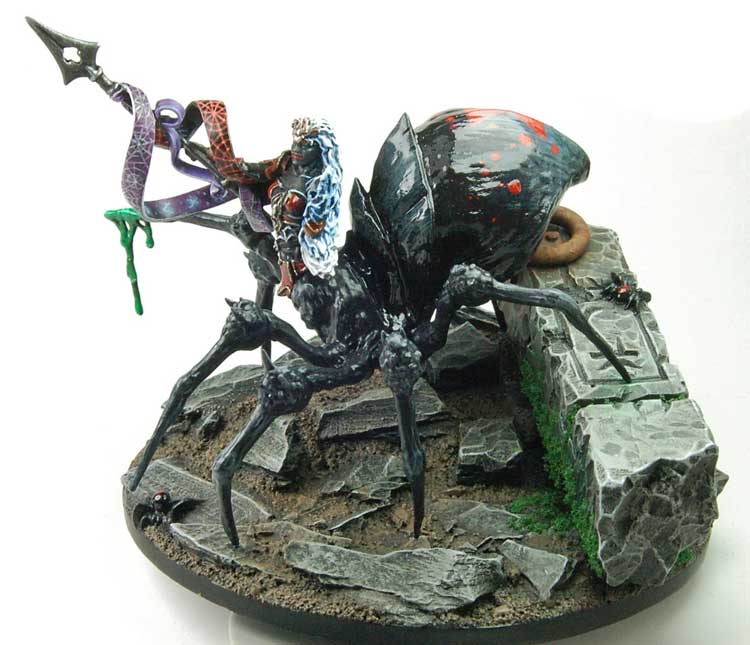
Lolth, Demon Queen of Spiders (71003) Lolth, Demon Queen of Spiders (71003)
 Haven't bought your Loth yet? Click here to find her in our store...

Painting the Spider Lolth: advanced painting guide

To start with the spider was given a coat of black primer. For quick coverage and very smooth blending, I opted for using the airbrush and a ready mixed set of ‘German Grey’ tank colours from AK Interactive. This set provides a good foundation of pre-mixed grey colours.


With the airbrushed paint being so opaque, the next stage is to add highlights with a brush, where the pigment is stronger leaving a ‘line’ texture. I have used Light rubber 305 for this. For the final edge highlights, I have used Sky Grey 989.


The same colours were used all over the spider for highlights, concentrating on the knees and extremities.

It is at this stage the spider starts to look too grey and not black as intended, so I have started to ‘knock back’ the colour with thinned Tamiya transparent paints. 

This product is very useful for covering a large area with an even tint, as it does not form into puddles and dry unevenly. Another benefit of this range is that they dry  gloss, really bring out the original colours.

You can see the spider is starting to get back its black colour, with a hint of purple from the Tamiya colours.

After a few more coats of Tamiya Smoke (black), the whole model was left to dry fully. This give me an opportunity to talk about the scenic base.

Scenic Base

After a black primer coat, it is time to get out the drybrushes. 

For this Under Dark setting, I wanted to keep the ground a warm grey to counteract the dark spider body. Rocks colours can range from white to pink to all the browns and greys, so don’t feel limited to the standard gray tones. For this I have drybrushed German highlight 335 / light rubber 305 / Stonewall grey 049 over a black basecoat.


After the rocks are finished, the next step is to paint in the mud and stones. Because this is a smaller area, a smaller drybrush is required, for this I have used an old size ‘0’.

Groundwork

For the mud colour, I have used my favorite earth coloured paint- Panzer Aces Dark Mud -316. This paint dries with an incredible matt finish and has just the right tone. To pick out the detail, the mud was drybrushed with beige brown 875.


Again, this base is getting too light, so I have knocked it back with an oil filter. These are quick drying (for oils!) and you have the advantage of blending them with turpentine. The effect are quite profound.


Base details

The only stage left to do is to pick out the remaining details, the rusty column ring and a little moss on the fallen pillar.

For the rust effect, I have used a combination of products. AK Interactive rust streaks, Dark rust paint 302 and Orange brown 981. The ring was painted first, followed by the streaks down the stone. This gives the impression that the broken pillar has been there for some time.


To finish off the aging of the pillar, I carefully painted PVA glue into cracks and small areas, and stuck dark green flock down. The flock was carefully drybrushed with Flat green 968 to bring out the texture. I have left the spider on the base till I start pianting  Lolth herself.

 
Back to the spider body

Now the bulk of the painting is complete, I can glue the spider to the base. This allows me to see the model in situ  and to add any details overlooked. This also gives me the correct angles for light-sourcing.

Just like the base, it is time to start adding the details to the thorax. I have gone for the classic black widow spider, with her hour glass markings. To make it a little more organic, I have added small red dots around the main design, this helps break up the  large area.


For an extra rich colour, I have used Burnt Cad. Red 814 basecoat, followed by three coats of Ferrari Red 085 applied in small dots inside the base shapes.


Poison drip

To make this really stand out, I have chosen a bright green, followed by two coats of gloss.

Adventures with gloss varnish !

With the body near completion, the next step is to matt varnish the whole model including the base. This adds another layer of protection before I hand-paint the gloss varnish (the Vallejo gloss has a good shine, but does require two coats) over  the spider. 

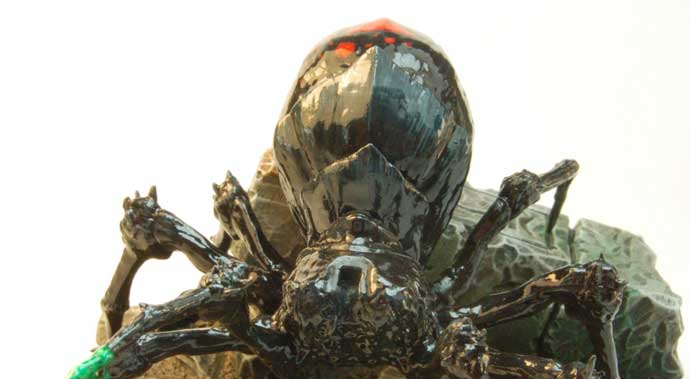
After the standard two coats of gloss were applied, something unexpected happened. As you can see, some of the highlighted areas disappeared underneath the shine. Not a disaster, but annoying, none the less.


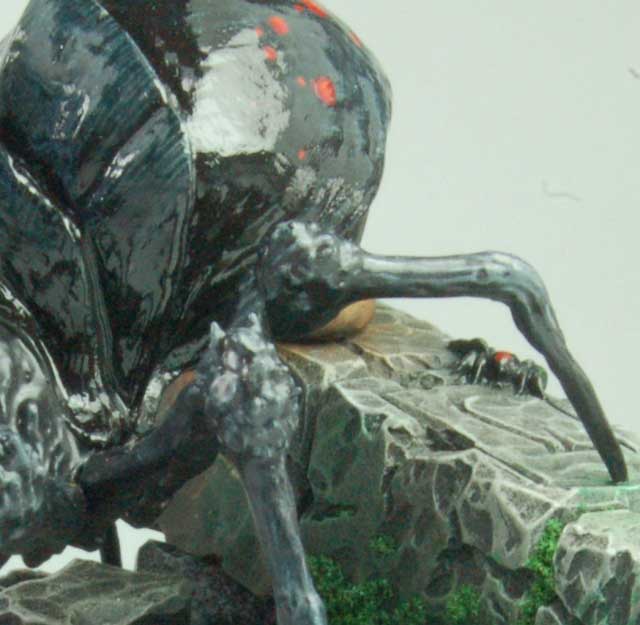
The solution was to re-highlight the edges and knee joint with light rubber 305 and sky grey 989, and use satin varnish on the front body part and legs. This less shiny finish allows the highlights to been seen properly.
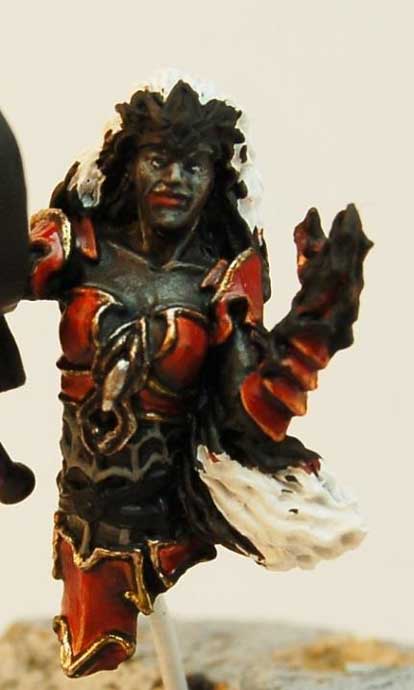
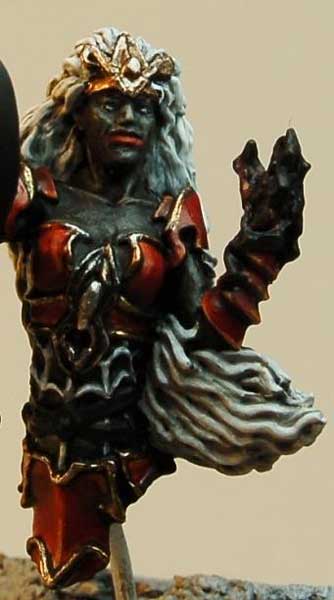
 

Painting Lolth

I needed a colour scheme to compliment the spider, so I decided on rich red gloss armour with a dark purple secondary colour.

With most of the figures I paint, I normally start with either the largest area or the most difficult part (to get it out the way!). In this case the spear and decorated ribbons.


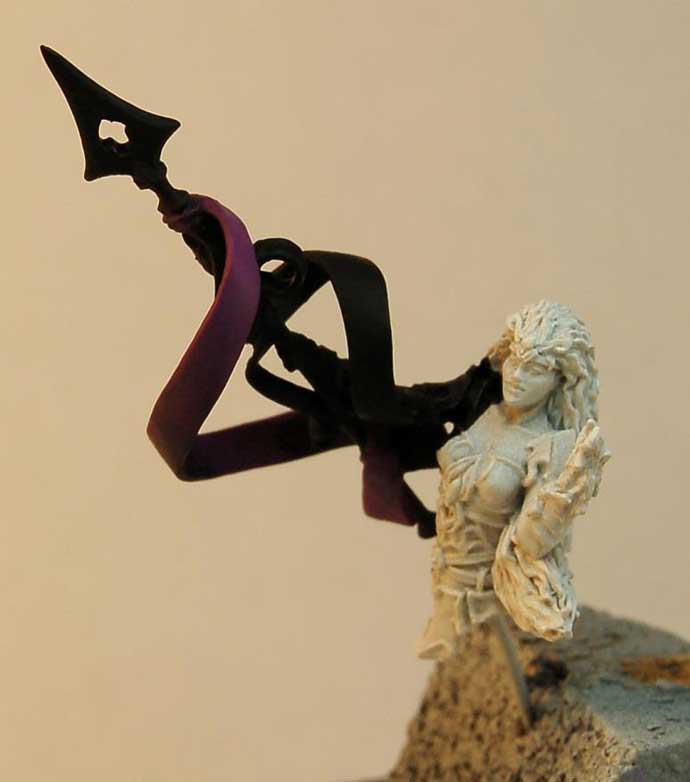
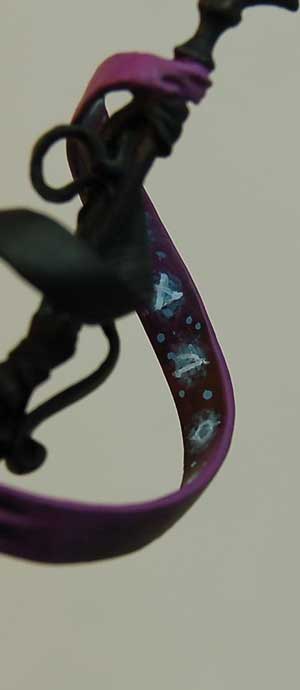
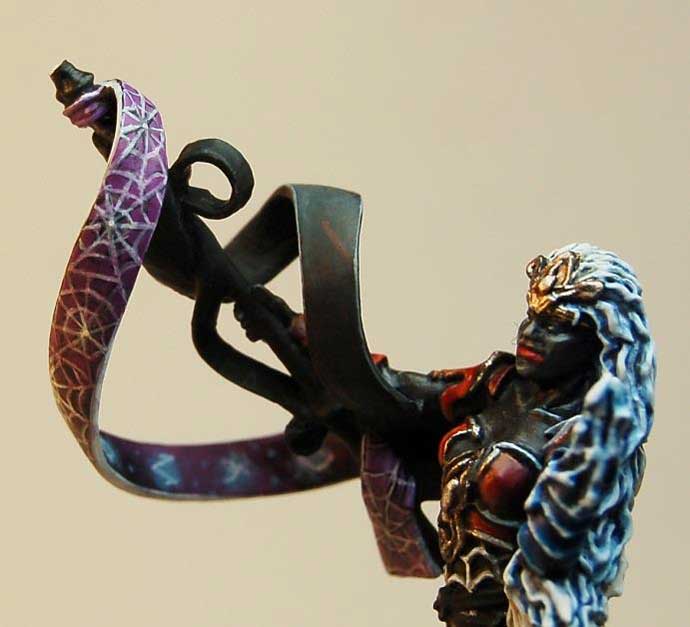
The dark purple clour is a 50/50 mix of black and Violet Red 812 basecoat, with a 812 mid-coat and a Squid pink 013 highlight. The magic symbols are treated differently by painting very thin Sky blue 961 patches along the ribbon with a few random dots, followed by white symbols in the middle.

I wanted a break from the detail work, so I moved on to the red armour.


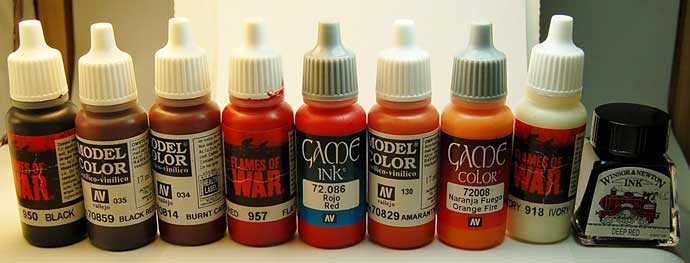
These are the paints used, going from the black red, through to mid-reds, oranges and highlights of ivory. The armour was knocked back with deep red ink and re-highlighted with Orange fire and Ivory again.


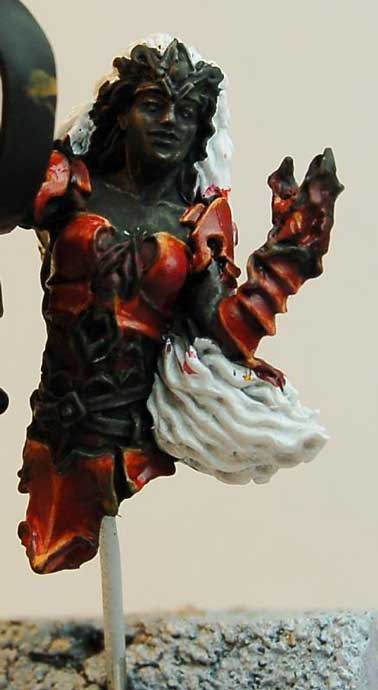
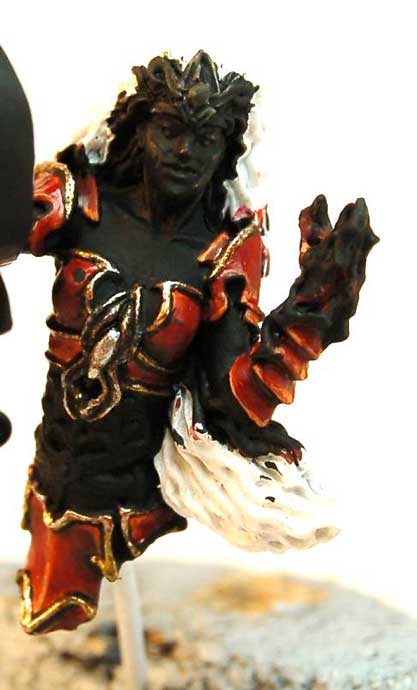
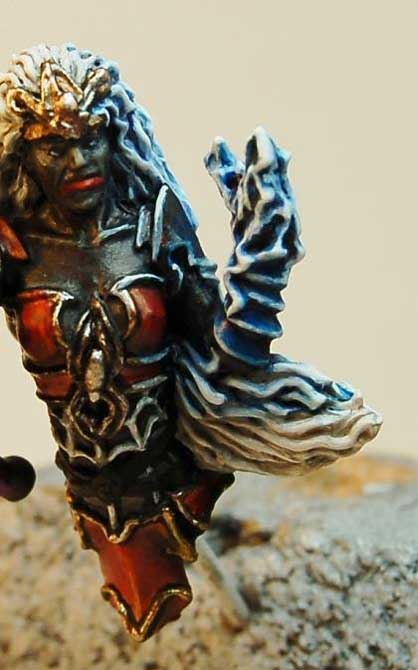
To tidy up all the armour edges, I painted a black border ready for the gold and silver borders. I have used bronze 998 as the shade, building up to a pure silver highlight concentrating on the spider in the middle of her body.
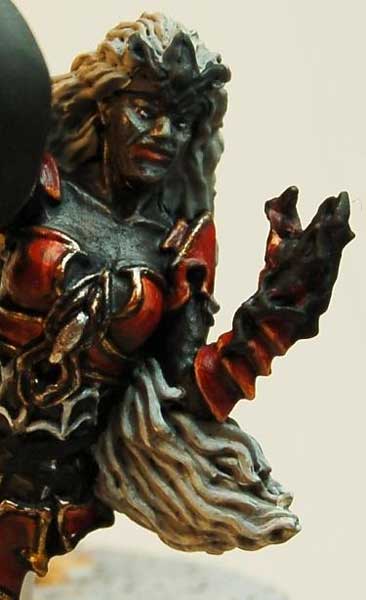
Painting Drow Skin

I don’t pretend to be an expert in painting Drow skin and it took me a few attempts and paint mixes to get the tone right. I have gone for a dark brown, highlighted with warm greys.
 
 
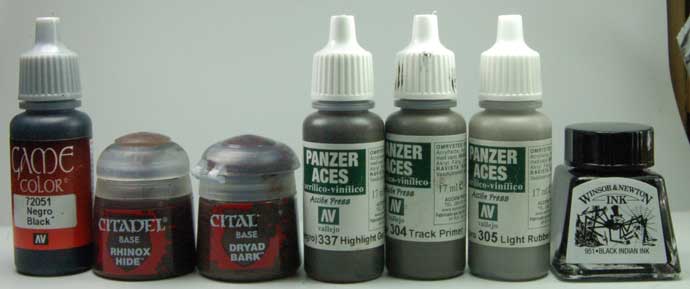
The paint mix is: Rhinox hide + black 50/50 - Rhinox hide + black 50/50 + Dryad Bark – Dryad Bark – German 337 – track primer 304  -  Light rubber 305 -  thin black ink wash – re-highlight with  305.


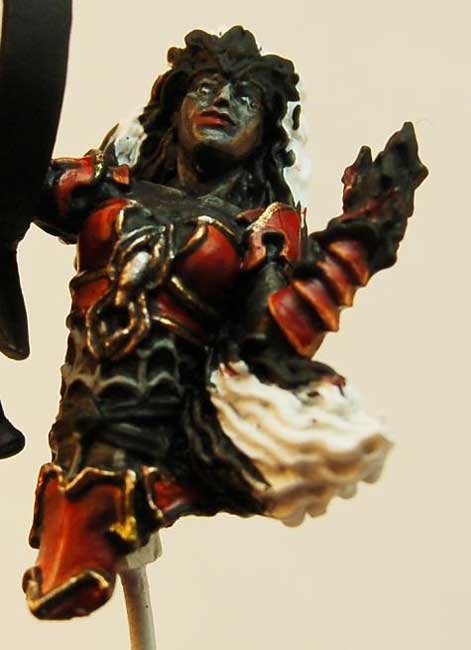
Her lips are Ferrarri Red to compliment her armour and spider markings.
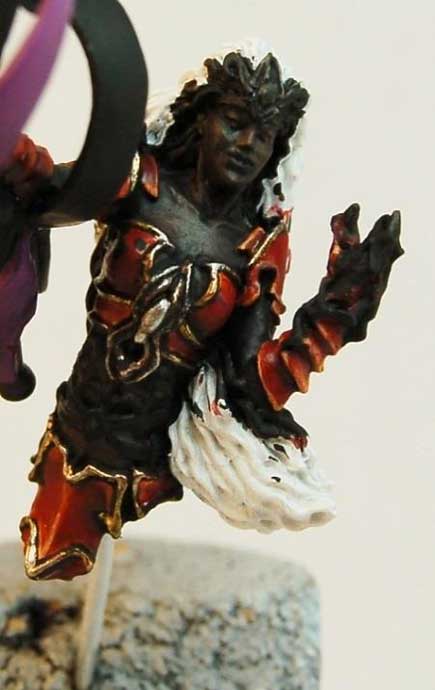
Lolth Details

Now the two main areas of colour are finished, it’s now time to turn to the details. 

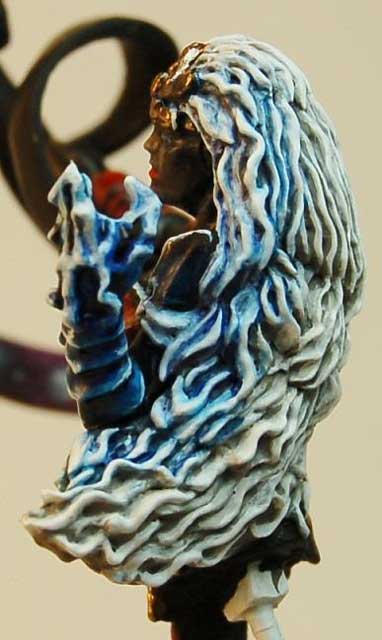
Her hair has a basecoat of light rubber, followed by two additions of white paint to the mix, until you have pure white at the extreme ends. I have also painted the gold head-dress in the same colours as her armour borders.
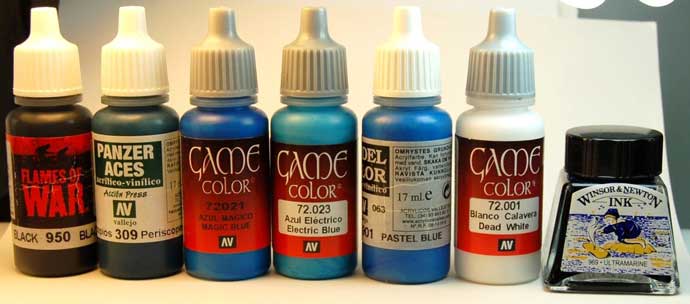
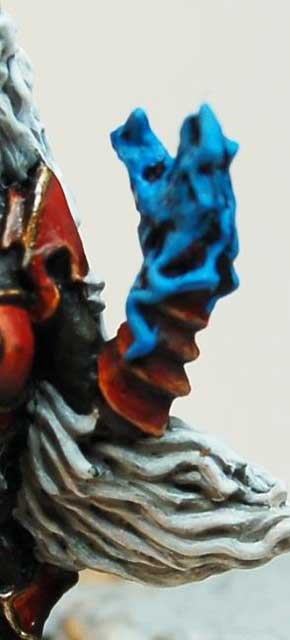
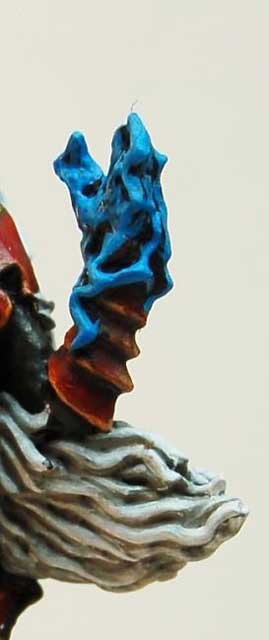
        

Lightning effects

This area is a great place to add some light effects here. With some carefull washes, you can really make this another focus point of the model.

For the lightning I have used these paints, with the same principle: after the wash, re-highlight.


Back to the spear

As you can see, I snapped the end off the spear while working. The only thing to do here, is to pin the tip back on for a solid fit.

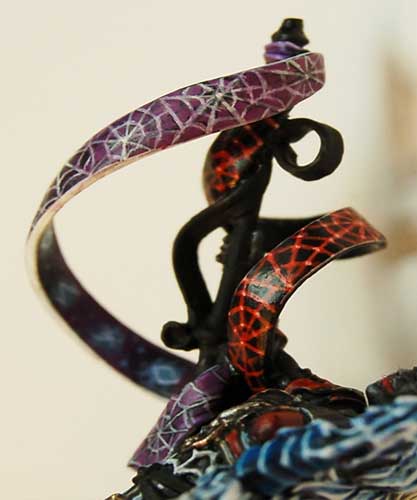
I wanted to make sure that the spider iconography was present over the model. What better pattern than a web? I have used ghost grey 046 – sky grey 989 – white edges.


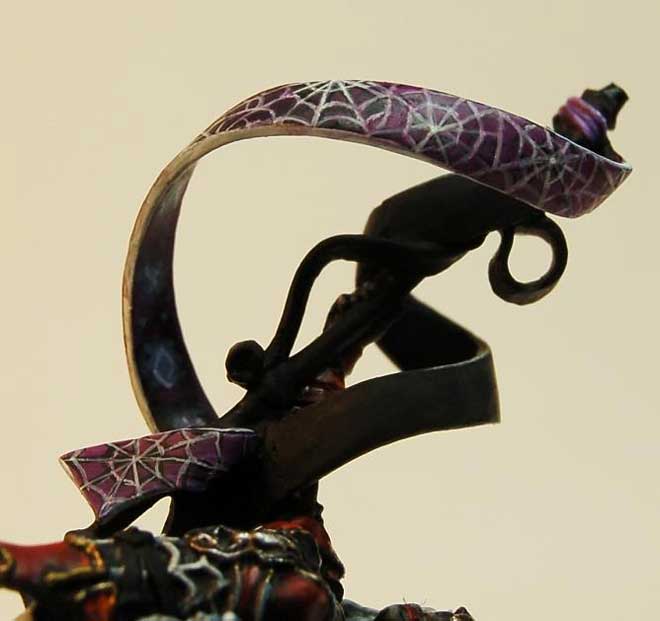
I have repeated the pattern, but in red for the other ribbon as well. Because red’s are not the strongest pigment, I first painted the spiders web with Orange fire 008, which has a strong pigment and knocked back the colour with a deep red ink wash. Where the webs meet, are highlighted with the Orange fire paint.


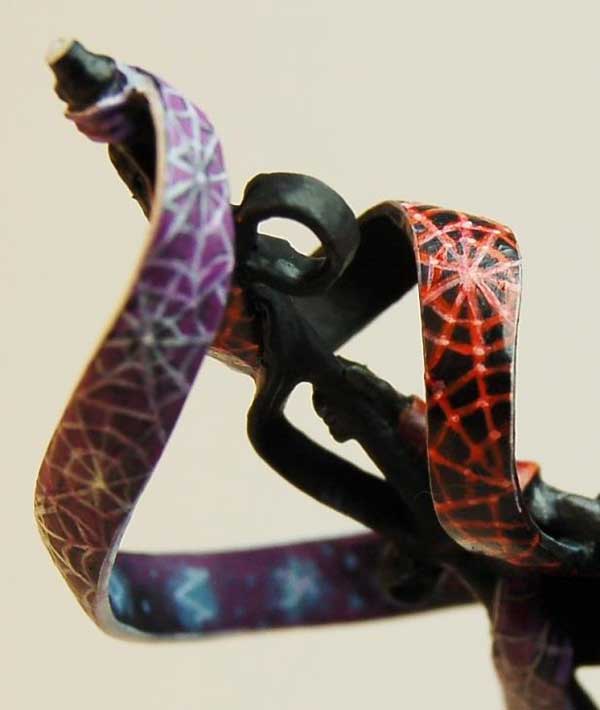
The fishnet effect was a grid painted on with light rubber and highlighted with sky grey where the two strands meet.


The finished model.